
News

Decoding Light Switch Wiring Diagrams: A Clear Path to Safety
Decoding light switch wiring diagrams is the difference between a cozy glow and a blown fuse at 9 p.m. It sounds technical, yet it’s really about keeping your home safe and your renovation from going sideways. When wires get crossed, costs climb fast and stress hits harder. Clear diagrams cut the guesswork, protect your investment, and make every switch flip feel steady, solid, and drama-free. No sparks, no surprises. If you are using a light fixture with a 3-way switch, I recommend that you first read this article: 3-Way Light Switch Wiring: A Step-by-Step Guide. Reading Notes: Decoding Light Switch Wiring Diagrams ➔ Identify Hot and Neutral Paths: Trace color-coded lines or numeric labels to balance load and avoid overloads. ➔ Verify Grounding Compliance: Match ground symbols to NEC guidelines to ensure safe fault clearing. ➔ Interpret Breaker and Line Symbols: Confirm voltage rating and circuit protection for each switch and luminaire. ➔ Match Switch Types: Compare symbols for single-pole, three-way, or dimmer switches to prevent miswiring. Why Decoding Light Switch Wiring Diagrams Matters If you’ve ever stared at a switch plate and thought, “What’s really going on behind that wall?” you’re already halfway into decoding light switch wiring diagrams. Getting comfortable with light switch wiring diagrams isn’t just for pros. It keeps your space safe, efficient, and code-compliant. Preventing Overloads: Recognize Hot Wire and Neutral Wire Paths When decoding light switch wiring diagrams, start by tracking the hot wire and neutral wire through the full circuit path. That’s where overload problems usually hide. In a basic parallel setup: The hot wire carries incoming voltage from the breaker. The neutral wire returns current to complete the current flow. An imbalance here can trigger an electrical overload. Follow the line from the panel. Confirm switch interruption is on the hot side. Check that the neutral remains continuous. Within a wiring diagram, look for: Line voltage entry Connected to switch terminal Routed to luminaire Neutral return Shared bus connection Back to panel bar Misreading these paths during decoding light switch wiring diagrams can overload conductors and trip breakers. Solid electrical safety starts with knowing which conductor does what. Brands like Antizer Lighting design fixtures that clearly label terminals, making light switch diagram reading less of a headache. Ensuring Grounding Compliance with NEC and Ground Symbol Checks Grounding isn’t optional; it’s your backup plan when things go wrong. While decoding light switch wiring diagrams, confirm every ground symbol ties back to an earth ground point. Check for: Continuous grounding conductor Bonded metal boxes Panel connection aligned with NEC Nested review helps: Device level Green screw connection Box level Ground splice integrity Panel level Bonded neutral/ground per electrical code Meeting electrical compliance and current safety standard rules reduces shock risks and improves fault clearing. Antizer Lighting integrates clear grounding marks in its product schematics, simplifying decoding light switch wiring diagrams for installers. Optimizing Circuit Protection by Understanding Circuit Breaker Symbols Protection starts at the panel. While decoding light switch wiring diagrams, pay attention to each circuit breaker and electrical symbol tied to load ratings. At the electrical panel: Identify breaker amperage. Match conductor size. Confirm overcurrent protection type. Layered check: Breaker rating 15A or 20A typical lighting Compatible fixture load Backup device Fuse (if present) Rated for line voltage Accurate reading of circuit protection symbols prevents overheating and protects every electrical safety device downstream. When you get comfortable with decoding light switch wiring diagrams—and even basic switch wiring schematics—you stop guessing and start wiring smart. Colors vs. Numbers: Diagram Preferences Getting comfortable with decoding light switch wiring diagrams starts with how you read visual cues. Some folks rely on color; others trust numbers. When decoding light switch wiring diagrams, your brain tends to latch onto either shades or digits. This guide breaks down both styles so decoding light switch wiring diagrams feels less like guesswork and more like second nature. Color Coding When decoding light switch wiring diagrams through color systems, clarity often comes from organized visual layers built around wire insulation and standard colors. Visual Identification Framework Core Conductors Hot wire → typically black or red under common wiring standards Neutral wire → usually white for steady return paths Ground wire → green or bare copper for safety Load Path Load wire directs power toward the fixture Phase Awareness Phase identification prevents cross-connection errors Functional Mapping in Diagrams Junction box to switch loop Track hot feed entering Follow switched leg exiting Switch to fixture Confirm neutral continuity Verify grounding path Below is a quick technical comparison used in training labs: Conductor Type Standard Color Voltage Role Diagram Symbol Ref Safety Priority Hot Black/Red Line (120V) L / COM High Neutral White Return N Medium Ground Green/Bare Protective GND Critical Traveler A Red Switched T1 High Traveler B Black Switched T2 High Brands like Antizer Lighting design layouts where color logic matches real-world wiring standards, making light switch wiring diagrams easier to follow on-site. Numeric Labeling For tech-heavy environments, decoding light switch wiring diagrams often leans on structured numbering tied to terminal numbers and connection points. Terminal Hierarchy Primary Node Common terminal marked as 1 or COM Switching Paths Traveler wire linked to terminals 2 and 3 Incoming Power Line feed labeled L1 Circuit Tracing Logic Step inside the panel drawing Match reference numbers to legend Cross-check with component labels At device level Verify pin assignments Confirm alignment with schematic symbols Numeric systems shine in commercial builds. Large relay racks and multi-gang setups rely on wire identification tags rather than insulation shade alone. That’s why many installers decoding switch wiring diagrams prefer numbered mapping when circuits stack up. Antizer Lighting integrates both circuit tracing clarity and color-aligned layouts, so decoding light switch wiring diagrams works smoothly for visual learners and number-focused pros alike. 4 Safety Checks Before Wiring Your Switch Before grabbing tools and jumping into decoding light switch wiring diagrams, slow down. A wiring diagram only makes sense when safety is locked in. These four checks keep your hands safe and your wiring clean. No guesswork. No sparks. Just smart, steady work. Safety Check 1: Cut Power at the Circuit Breaker and Verify Line Voltage Symbol When decoding light switch wiring diagrams, safety always starts at the circuit breaker. At the panel: Locate the correct circuit breaker controlling the power. Flip it fully off, not halfway. Apply lockout if others are nearby. At the switch box: Use a tester to confirm zero voltage on the line conductor. Look for the line voltage symbol on the wiring diagram and match it to the incoming hot electricity feed. Re-test before touching any conductor. Quick reminders: No tester beep? Still verify twice. No live power, no problem. Decoding light switch wiring diagrams gets easier when you know the hot line is truly dead. Safety Check 2: Inspect Wire Nut Connections and Neutral Wire Terminations Loose splices ruin even the cleanest light switch wiring diagram. Inside the box: Check each wire nut for tight connection. Tug gently on conductors to confirm secure termination. Inspect insulation for nicks or burn marks. For the neutral wire: Confirm all neutrals are bundled properly. Match the neutral path shown in the diagram to actual wiring. Ensure no exposed copper extends beyond the wire nut. Good inspection prevents arcing and keeps your electrical setup solid. Safety Check 3: Confirm Ground Wire Continuity and Grounding Standards Grounding isn’t optional. It’s your backup plan. Test ground wire continuity: From device yoke to metal box. From box to panel ground. Verify against grounding standard requirements: Continuous grounding path. Proper bonding screw installed. No broken circuit return route. Why it matters: A clean electrical fault path trips the breaker fast. Better safety, less damage. When decoding light switch wiring diagrams, always trace the ground symbol as carefully as the hot line. Safety Check 4: Match Switch Symbol to Device Type (Single-Pole, Three-Way, Dimmer) Misreading a switch symbol is how traveler wires get crossed. Identify the device type on your wiring diagram: Single-pole: one hot in, one switched hot out. Three-way: common terminal plus traveler pair. Dimmer: control module replacing standard switch. At the device: Locate the common screw. Confirm traveler placement on a three-way. Follow manufacturer markings for a dimmer. Double-check: Symbol matches hardware. Terminals align with the light switch wiring diagram. Decoding light switch wiring diagrams isn’t just reading lines on paper. It’s matching symbol, device, and real-world wiring diagram logic so everything clicks on safely. Color-Coded Clarity — Decoding Light Switch Wiring Diagrams Simplified Trying to make sense of wires behind a wall can feel like staring at spaghetti. That’s why decoding light switch wiring diagrams matters. When you break the phrase into light + switch + wiring + diagrams, it becomes less scary. This guide walks through switch symbols, traveler paths, and fixture placement so reading light switch diagrams feels doable, not overwhelming. Reading Switch Symbol Colors for Single-Pole and Three-Way Switches When decoding light switch wiring diagrams, start with the switch symbol and its color markings. That’s the cheat code. Identify switch type in the wiring diagram 1.1 Single-pole One control point Two terminal screws (plus ground) Hot wire in, switched hot out 1.2 Three-way Two control points Three active terminal screws One darker screw = common Track color logic 2.1 Black or red = hot feed 2.2 White (re-identified if taped) = traveler in some setups 2.3 Green/bare = ground Confirm routing 3.1 For single-pole, power flows line → switch → load 3.2 For three-way, power flows: Source → common terminal Across traveler pair Back through second three-way → fixture In real projects at Antizer Lighting, reading switch wiring diagrams starts by circling the common screw. Miss that, and the whole layout feels upside down. Mapping Traveler Wire and Common Terminal in Multi-Switch Circuits In multi-switch layouts, the traveler wire is the bridge. The common terminal is the anchor. Lose track of either and decoding electrical switch diagrams turns messy. Here’s a quick comparison table used during troubleshooting: Circuit Type Traveler Wires Common Terminal Location Typical Voltage (V) Single-pole 0 Line side 120 Three-way A 2 Source switch 120 Three-way B 2 Load switch 120 Four-way 2 pairs Between 3-ways 120 To map correctly: Trace the wiring diagram from power source. Mark the darker terminal screw as common. Follow both traveler lines between switches. Verify continuity before energizing the circuit. Short version? Travelers talk to each other. The common decides who speaks to the load. Identifying Junction Box Symbol and Fixture Symbol for Luminaire Installation In lighting layouts, symbols matter as much as wires. While decoding light switch wiring diagrams, spotting the junction box symbol keeps connections safe and code-aligned. Locate distribution point 1.1 Square or octagon mark = junction box 1.2 All splices remain inside this enclosure Identify load endpoint 2.1 Circle with cross = fixture or luminaire 2.2 Driver may be internal or remote Connect conductors logically Hot from switch → fixture lead Neutral tied through box Ground bonded to metal housing During installation 4.1 Secure box to framing 4.2 Cap unused wiring leads 4.3 Confirm rated capacity for electrical load At Antizer Lighting, fixture diagrams are drawn so even beginners decoding light switch wiring diagrams can follow the flow from symbol to lamp. Clear marks. Clean routing. No guesswork. Once you get used to reading light switch wiring diagrams this way, the wall stops being a mystery. It’s just logic in color. Home Renovation: Decoding Light Switch Wiring Diagrams Tackling home upgrades gets a lot easier when decoding light switch wiring diagrams stops feeling like reading a foreign language. Break the phrase down—decoding / light switch / wiring / diagrams—and it’s simply about understanding how power flows. This guide keeps things practical, real, and hands-on. Kitchen Remodel: Integrating Occupancy Sensor and Relay Controls In a busy kitchen remodel, adding an occupancy sensor tied to a relay sharpens energy control. While decoding light switch wiring diagrams, focus on how line, load, and neutral interact within the wiring layout. Power Source Line conductor feeds: Sensor input Relay coil Neutral ties back to panel bar Control Logic Sensor detects motion Signal energizes relay Relay closes contacts powering luminaires Key checkpoints: ✔ Match voltage rating (120V or 277V) ✔ Confirm relay load capacity ✔ Verify electrical box fill limits When decoding light switch wiring diagrams here, think flow, not clutter. The sensor doesn’t carry full load; the relay handles it. Brands like Antizer Lighting design fixtures that pair smoothly with smart controls, reducing guesswork in light switch wiring diagrams during remodel projects. Living Room Update: Wiring a Three-Way Switch for Ambient and Task Lighting In the living room, a three-way switch setup handles ambient lighting and task lighting from two spots. Decoding light switch wiring diagrams for this setup means tracking traveler wires carefully. Step-by-flow structure: Power enters common terminal of Switch A Two travelers run between switches Common of Switch B feeds lighting circuit Within the box: Black (line or load) Red (traveler) White (re-identified traveler if required) Small reminders: Label travelers before disconnecting Keep grounding continuous Maintain clear wiring separation While decoding light switch wiring diagrams in a living room update, remember: the travelers don’t connect to neutral. That single detail clears up most confusion. Bathroom Upgrade: Adding a Timer Switch and GFCI-Compliant Circuit Protection A bathroom upgrade blends comfort and safety. A timer switch paired with GFCI circuit protection keeps damp zones compliant. Connection hierarchy: GFCI Line Terminals Incoming hot Incoming neutral GFCI Load Terminals Feed timer switch Protect downstream circuit protection path Timer Output Controls luminaire hot Neutral bypasses timer Keep this tight: Test GFCI monthly Confirm grounding continuity Use damp-location rated devices Decoding light switch wiring diagrams in bathrooms means double-checking protection paths. One misplaced neutral can defeat the GFCI. Clear labeling, careful termination, and reliable fixtures from Antizer Lighting make decoding light switch wiring diagrams far less stressful—and a lot safer. FAQs about Decoding Light Switch Wiring Diagrams How does decoding light switch wiring diagrams help during home renovation? A clear diagram turns a risky guess into a controlled plan. When decoding light switch wiring diagrams, you can see how the hot wire, neutral wire, and ground wire travel from the source to the load inside the junction box. That clarity helps you: Match the switch symbol to the correct device — single-pole switch, dimmer, or smart switch Confirm how the fixture symbol connects to the luminaire, lamp holder, or driver Prevent overload by identifying the circuit breaker symbol and checking the voltage rating Keep illumination steady by wiring fixtures in the right parallel circuit instead of a failing series circuit One misread wire path can dim a room, trip a circuit breaker, or damage a ballast. A decoded diagram protects both your lighting design and your peace of mind. How do traveler wires function in a three-way switch setup? A hallway goes dark. One switch works, the other fails. The diagram usually tells the truth. In a three-way switch system: The common terminal connects to the incoming hot wire (line) or outgoing load. Two traveler wires run between switches, forming alternate paths for current. The selected path completes the circuit to the luminaire housing and socket. Key checkpoints inside the junction box: ✅ Tight wire nut connections ✅ Correct identification of the line voltage symbol ✅ Continuous ground wire tied to the ground symbol If a traveler lands on the wrong terminal, the switches fight each other. When wired correctly, either switch controls the same ambient or task lighting smoothly. What safety steps matter most before working with any wiring diagram? Electricity is silent. Respect keeps it that way. Before touching a single-pole switch, timer switch, or occupancy sensor: Turn off the related circuit breaker and apply lockout/tagout Test for absence of voltage at terminals marked by the line voltage symbol Verify bonding of all metal housings using the ground symbol as your guide Check insulation integrity and confirm components are UL listed NEC (National Electrical Code) standards exist for one reason: controlled grounding, proper circuit protection, and safe handling of every conductor inside the box. Decoding light switch wiring diagrams is not just technical skill—it is personal safety written in symbols.
Read more
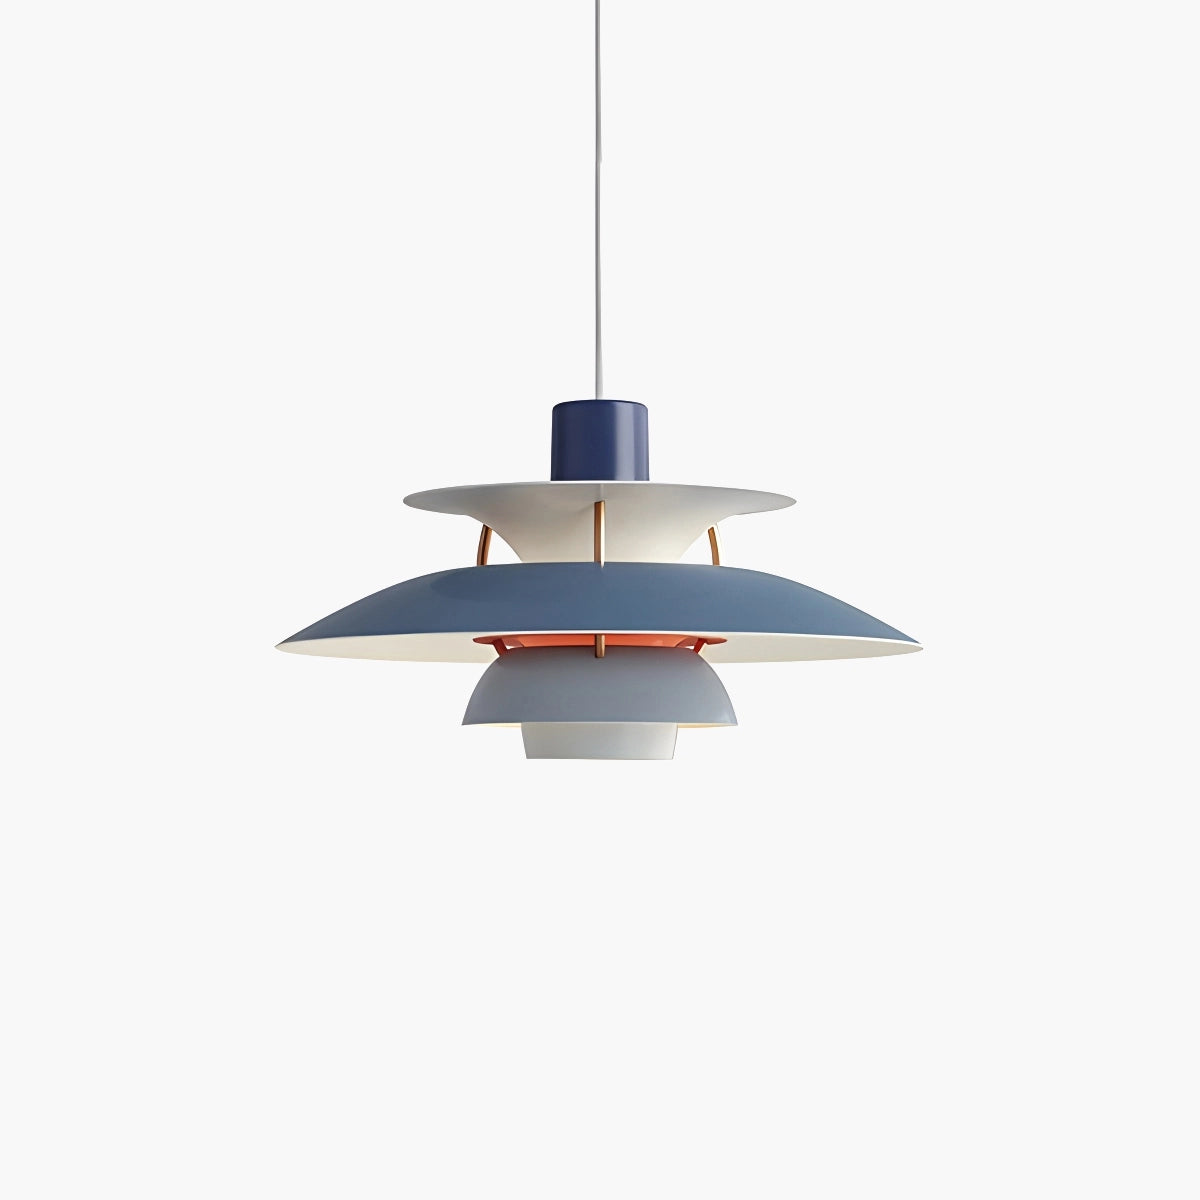
3-Way Light Switch Wiring: A Step-by-Step Guide
3 way light switch wiring fixes a daily headache—no more trekking across dark hallways. It adds control, safety, and a polished feel to ordinary rooms. The U.S. Department of Energy reports rising adoption of residential lighting controls in 2025, reflecting homeowner demand for smarter, code-compliant installations across new construction. Introduction: Why 3-Way Light Switch Wiring Matters Getting 3 way light switch wiring right isn’t just about flipping lights on and off. It shapes how people move through a pathway, step into a room, and feel safe at night. When 3 way light switch wiring is planned well, daily control feels smooth, not clunky. Let’s break down why this wiring method matters in real homes and job sites. Enhancing Pathway Illumination and Room Entry Control When planning 3 way light switch wiring, focus on how lighting supports movement and convenience. Staircases and long pathway runs Top landing switch Bottom landing switch Shared traveler wires for balanced illumination Large room layouts with dual entry points Door A switch Door B switch Central fixture responding to either control point Commercial corridors Multi-door access Code-aligned traveler routing Reliable lighting response during peak use With 3 way light switch wiring, no one walks into a dark hallway hunting for a switch. A properly wired 3 way switch wiring setup keeps illumination steady and predictable. Many installers pair these layouts with fixtures from Antizer Lighting, since consistent output makes multi-point control feel seamless. Comparing Single-Pole and Multi-Location Control Solutions Understanding 3 way light switch wiring starts with comparison. Single-pole setup One switch One control point Direct hot-to-load path Three-way switch wiring Two switches Traveler connections Flexible multi-location solutions Four-way expansion Adds intermediate switch Keeps traveler continuity Ideal for extended wiring runs A basic single-pole switch works fine in a small room. But in longer spaces, 3 way light wiring wins. It offers smarter control solutions, smoother traffic flow, and safer nighttime entry. Ensuring NEC Compliance and Overload Protection Safe 3 way light switch wiring depends on tight NEC compliance and solid protection practices. Electrical box sizing Count conductors Match cubic inch rating Prevent heat buildup Conductor selection Correct gauge for circuit ampacity Proper insulation rating Clear traveler identification Safety grounding Bond metal boxes Secure ground to green terminal Reduce shock risk Poor wiring invites overload trouble. Correct breaker sizing, grounded metal parts, and clean terminations keep overload protection intact. Antizer Lighting often recommends pairing certified fixtures with properly rated circuits, so your 3 way light switch wiring setup stays safe, steady, and fully aligned with current regulations. What Is 3 Way Switch Wiring? 3 way light switch wiring sounds tricky at first, but it’s just a smart way to control one light from two spots. Once you break down 3 way light switch wiring into wires, terminals, and switch types, it all clicks. Tour of a 3-Way Switch and Toggle vs. Rocker Variants Understanding 3 way light switch wiring starts with the device itself: the 3-way switch. Core parts inside the switch Switch terminals One common wire terminal (usually darker screw) Two traveler wire terminals Internal switch mechanism Moves electrical contacts between traveler paths Protective switch housing Fits inside the wall box safely In a 3 way light switch wiring setup, the common wire connects to line (power) or load (light), while the traveler pair links both switches. Style choices? Toggle switch: classic up-and-down feel. Rocker switch: flat paddle, modern vibe. Both handle the same electrical circuit logic. In clean installs from Antizer Lighting, the fit and finish of the rocker design often matches contemporary ceiling light and recessed lighting layouts better. The Role of Common Wire and Traveler Wire in Circuit Design In 3 way light switch wiring, power flows through a smart path. Power path overview From power source → into common wire Through one of two traveler wires Across the second switch Out the other common wire → to load Inside the switch box, this creates a flexible circuit design. Flip either switch, and the electrical circuit reroutes. That’s why 3 way light switch wiring works even if the other switch is up or down. A typical wiring diagram shows crossed traveler lines. In real life, it just means alternate voltage routes. Simple, yet clever. Integrating Dimmer Switches and Smart Switchs in Multi-Location Setups Modern 3 way light switch wiring goes beyond basic toggles. Adding a dimmer switch Replace one standard 3-way switch with a rated dimmer Keep traveler connections consistent Adding a smart switch Install a master switch at line side Pair with a companion switch at the other location Ensure neutral wire is present in the electrical box In a multi-location setup, Wi-Fi control and home automation sit on top of traditional 3 way light switch wiring logic. A good smart switch still depends on correct traveler routing. Antizer Lighting supports LED-ready solutions that align with safe 3 way light switch wiring practices and stable dimming performance. Differences Between 3-Way and 4-Way Switch Configurations Here’s where 3 way light switch wiring meets expansion. Standard two-location control Two 3-way switches One lighting circuit Three or more locations Two 3-way switches (at ends) One or more 4-way switches in between Acts as an intermediate switch Swaps traveler paths internally A 4-way switch doesn’t replace 3 way light switch wiring; it extends it. The outer switches still carry the common wire connections, while the middle device manages traveler crossover. So if hallway control feels like magic from three spots, that’s just well-planned electrical wiring doing its thing. 5 Tools for Smooth 3-Way Light Switch Wiring Getting 3 way light switch wiring right isn’t just about connecting a few wires and hoping for the best. From clean wire prep to safe circuit testing, the right tools make your 3 way switch wiring smoother, safer, and way less stressful. Cable Stripper for Precise Wire Gauge Preparation Clean 3 way light switch wiring begins with tight, accurate wire preparation. A solid cable stripper—sometimes called a wire stripper—keeps the electrical wire intact while removing just enough insulation. When prepping for 3 way switch wiring, focus on: Correct wire gauge slot selection Even pressure with the stripping tool No nicks on copper conductors For typical 3 way light switch setups: Identify traveler wires. Match the wire gauge marking. Strip about 3/4 inch of insulation. Twist strands neatly before termination. If you break it down further: Conductor care Avoid scoring copper Keep strands tight Insulation control Remove only what’s needed Prevent exposed excess Sloppy stripping can mess up your entire 3 way light switch wiring job. Clean cuts mean better terminal contact and fewer callbacks. Multimeter to Verify Hot Wire Voltage and Grounding Before powering any 3 way switch wiring, grab a multimeter. Testing isn’t optional—it’s survival. For safe electrical testing during 3 way light switch wiring: Check voltage on the hot wire Confirm grounding continuity Test traveler wire continuity Measure stray electrical current A quick workflow helps: Set the multimeter to AC voltage. Probe hot to neutral. Probe hot to ground. Switch positions and retest the circuit. Under the hood of a proper check: Voltage verification 120V reading (typical residential) Stable measurement across switches Ground validation Low resistance path Secure bonding The U.S. Consumer Product Safety Commission noted in a 2024 residential safety update that improper home electrical testing remains a leading contributor to preventable shock incidents during DIY upgrades. Good 3 way light switch wiring depends on knowing exactly which conductor is hot before touching anything else. Junction Box and Wire Nut Installation Kit Every 3 way light switch wiring layout needs a solid junction box setup. Loose splices inside walls? That’s asking for trouble. Core components include: Rated electrical box Quality wire nut connectors Approved wire connector types Proper electrical enclosure When assembling: Box placement Secure to framing Maintain cubic inch fill limits Splice organization Match conductors by function Twist wires clockwise before adding a wire nut Cover protection Install plate flush Keep all electrical wiring enclosed For 3 way switch wiring, traveler wires and common terminals often meet inside the junction box. Tight connections reduce heat buildup and keep your 3 way light switch wiring clean and code-aligned. Electrical Conduit Assembly for Protected Circuit Paths In exposed areas, electrical conduit protects every inch of 3 way light switch wiring. It’s not just neat—it’s protection. Think in layers: Physical safety Shield electrical wiring from impact Reduce moisture exposure Routing clarity Define the circuit path Support organized 3 way switch wiring Hardware fit Use correct conduit fitting Secure full conduit assembly A smart install flows like this: Measure run length. Cut conduit cleanly. Attach conduit fitting ends. Pull wires using fish tape. Secure runs with straps. Protected wire protection means fewer surprises later. When your 3 way light switch wiring runs through garages or basements, conduit keeps things safe and tidy. UL Listed Switch Tester for Safety & Compliance After completing 3 way light switch wiring, testing the electrical switch is the final checkpoint. A UL listed switch tester acts as a compact safety device for: Correct traveler configuration Proper common terminal placement Ground fault detection Code-aligned circuit testing Use it like this: Energize the circuit. Toggle each switch position. Confirm load response. Watch for miswire indicators. In detail: Compliance check Matches electrical code expectations Verifies safe switching logic Functional check Light responds from both ends No flicker or delay Reliable testing wraps up your 3 way light switch wiring the right way. When the switch flips smoothly from either side of the room, you know the 3 way wiring job was done clean and safe. Line, Load, and Traveler Explained Getting comfortable with 3 way light switch wiring isn’t just about flipping lights from two spots. It’s about knowing your hot wire, understanding load limits, and keeping your wiring safe. Let’s break down 3 way, light switch, and wiring in a way that actually makes sense. Identifying Hot Wire, Load Capacity, and Ground Fault Protection In 3 way light switch wiring, power always begins with the hot wire, also called the live wire. Managing that energy safely depends on smart planning. Power Source Control 1.1 Circuit breaker sends voltage through the hot wire. 1.2 Proper labeling confirms safe current flow direction. 1.3 Testing tools verify which conductor is energized before touching switch wiring. Load Planning 2.1 Calculate total fixture wattage. 2.2 Convert wattage to amperage using: Amps = Watts ÷ Voltage. 2.3 Keep total electrical load below 80% of breaker rating to protect load capacity. Breaker Rating (A) Max Safe Load (80%) A Approx. Wattage at 120V 15A 12A 1440W 20A 16A 1920W 30A 24A 2880W Fault Protection 3.1 Install a ground fault circuit interrupter (GFCI) in damp areas. 3.2 GFCI detects imbalance in electrical current. 3.3 It cuts power instantly, boosting electrical safety in 3 way light switch wiring layouts. For homes upgrading to LED systems, Antizer Lighting fixtures are engineered to stay within safe load margins while maintaining steady output. Understanding Traveler Wire Paths in Stairwell and Hallway Lighting When dealing with 3 way light switch wiring, the magic happens in the traveler wire. In a stairwell, you tap the switch at the bottom. At the top, another switch flips the state. That’s the traveler doing its job. • A 3-way switch has two traveler terminals and one common terminal. • The traveler wire carries alternating current flow between switches. • The electrical path shifts depending on toggle position. Here’s how switch wiring typically runs in hallway lighting: Power enters the first switch common. Two travelers connect both switches. The second switch common feeds the lighting circuit. Simple, right? Yet small wiring errors can break the whole light switch wiring setup. According to the U.S. Energy Information Administration’s 2025 residential lighting update: “LED adoption in residential applications has surpassed 60% of installed sockets, reducing overall household lighting electricity consumption.” That shift means more homeowners are revisiting 3 way switch wiring to upgrade fixtures. Pairing efficient drivers from Antizer Lighting with proper traveler routing keeps stairwell lighting stable and flicker-free. Balancing Voltage and Amperage Across Lighting Zones Balancing voltage and amperage in lighting zones keeps 3 way light switch wiring reliable over time. A. Voltage Management A.1 Maintain consistent 120V supply across long runs. A.2 Minimize drop by using correct wire gauge. A.3 Confirm stable power distribution before final wall closure. B. Amperage Distribution B.1 Divide heavy electrical load across separate breakers. B.2 Monitor total wattage in multi-room light switch wiring systems. B.3 Prevent overheating inside junction boxes. C. Zone Coordination C.1 Map stairwell lighting separately from hallway lighting. C.2 Keep each lighting zone balanced within its circuit design. C.3 Test every 3 way light switch wiring connection before energizing. When voltage stays steady and amperage stays within range, fixtures last longer. The switches feel solid. And your 3 way, light switch, wiring setup works without drama. FAQs about 3 Way Light Switch Wiring How does 3 way light switch wiring improve lighting control in a home? 3 way light switch wiring brings multi-location control to life. One ceiling light or chandelier can respond from two room entry points—perfect for stairwell lighting or long hallway lighting. Power enters through the common wire. Two traveler wires carry switching signals between each 3-way switch. The fixture—LED fixture, wall sconce, or pendant light—turns on or off from either side. When a space demands more control points, a 4-way switch slips between the two 3-way switches, extending pathway illumination without changing the fixture itself. What tools and components are essential for safe installation? A smooth install blends preparation and precision: Cable stripper – trims insulation to match correct wire gauge. Multimeter – confirms hot wire, voltage, and grounding. Electrical box & junction box – contain splices and protect connections. Wire nut & electrical conduit – secure and shield every electrical wire. From rough-in wiring to trim-out, correct box sizing and insulation guard against overload protection failures and ground fault risks. Can a dimmer switch or smart switch work in a 3 way setup? Yes—if the circuit design supports it. A dimmer switch allows soft control over recessed lighting or a chandelier across shared lighting zones. A smart switch adds scheduling and remote access. The key details: Proper neutral connection Compatible load capacity for LED fixtures UL listed devices meeting electrical code One smart device, paired correctly with a 3-way switch, keeps control steady without flicker or voltage imbalance. Why is NEC compliance critical in 3 way light switch wiring? Improper amperage, loose grounding, or undersized wire gauge can turn a simple toggle switch into a hazard. NEC (National Electrical Code) standards ensure: Correct grounding paths Safe load capacity for ceiling light or pendant light circuits Approved electrical conduit and insulation Protection against overload and shock Behind every rocker switch click lies discipline in wiring—safety is the silent partner in every working circuit.

Top Trending Kitchen Island Pendant Lighting Ideas for This Year
Give your kitchen rockstar status with kitchen island pendant lighting ideas that flip dull counters into envy-worthy spotlight moments. The right glow over your counter can make or break the whole vibe. Scroll through any design feed and you’ll see it—kitchen island pendant lighting ideas stealing the spotlight like the lead singer in a band. One swap overhead, and suddenly your kitchen goes from “meh” meal prep zone to main-character energy. That’s the power play homeowners are chasing this year. Sales back it up. The U.S. lighting fixtures market was valued at over $30 billion in 2023, according to Grand View Research, with steady growth projected as homeowners invest in style upgrades that double as energy savers. Style matters—but so does the electric bill. If your island feels like a forgotten stage under a sad ceiling light, you’re not alone. The trends ahead mix swagger with smarts: sleek LEDs, warm farmhouse textures, sculptural shapes that whisper luxury without shouting at your wallet. Stick around—the drama overhead is just getting started. Why Kitchen Island Pendant Lighting Ideas Are Trending Now Kitchen upgrades are no longer just about cabinets and countertops. Homeowners are obsessing over kitchen island pendant lighting ideas, mixing style with smart tech and lower energy bills. From bold finishes to subtle glow-ups, kitchen island lighting ideas now shape the whole vibe. If you’ve been scrolling for pendant lighting for kitchen island inspiration, you’re not alone. Social media buzz: Minimalist LED pendants in Matte Black Minimalist feeds are driving serious love for kitchen island pendant lighting ideas built around clean lines and dark finishes. At the center of the trend: minimalist design slim profiles powered by LED technology bold matte black finish Why it pops on camera: High contrast against white marble Crisp edges that highlight a modern aesthetic Soft glow that enhances a sleek appearance Open-concept kitchens favor simple forms. Dark hardware ties in with faucets and cabinet pulls. Neutral palettes make black pendants the star. Under this wave of kitchen island lighting ideas, the vibe is calm but confident. A single row of matte black pendants can anchor the entire space. The contemporary style feels intentional, not flashy. For homeowners browsing pendant lighting kitchen island inspiration, brands like Antizer Lighting respond with streamlined silhouettes that balance drama and restraint, proving that less really can do more. Energy savings driving demand for Integrated LED solutions Energy bills hit hard, so kitchen island pendant lighting ideas now focus on performance as much as looks. Key reasons buyers switch: Noticeable energy efficiency Built-in integrated LED Extended long lifespan Homeowners want fewer bulb swaps and lower reduced electricity bills. That’s where eco-friendly lighting becomes a smart, sustainable choice for daily cooking and late-night snacks. The U.S. Department of Energy noted in its 2025 Solid-State Lighting report that widespread LED adoption continues to cut household lighting energy use significantly while improving product longevity. In practical terms, pendant lighting for kitchen island setups with integrated LEDs run cooler and last longer. For anyone comparing kitchen island lighting ideas, that combo of savings and simplicity feels like a no-brainer. Antizer Lighting integrates these features without sacrificing design, blending efficiency with sharp aesthetics. Farmhouse to Industrial: Versatile styles fueling popularity Scroll through today’s kitchen island pendant lighting ideas, and you’ll see style mashups everywhere. Farmhouse style Wood tones Woven shades Warm decorative lighting Industrial design Exposed hardware Metal domes Raw finishes Transitional fixtures Soft curves Mixed materials Balanced lines for versatile appeal Under each look sits the same goal: express personality through lighting. Diverse aesthetics allow one kitchen to feel cozy while another leans edgy. Pendant lighting kitchen island trends now cross boundaries, blending rustic charm with urban edge. When shoppers explore kitchen island pendant lighting ideas, this flexibility keeps options wide open. From soft farmhouse glow to bold industrial statements, the range supports true design freedom. Smart kitchens embrace Adjustable Height and Dimmable fixtures Tech-forward homes expect more from kitchen island pendant lighting ideas than simple on-and-off switches. Smart home integration Voice assistant pairing App scheduling Scene presets Physical flexibility adjustable height cords for tall ceilings Easy repositioning over expanding islands Light control dimmable control Fine-tuned customizable lighting Subtle shifts for mood setting Focused task lighting Cooking needs bright clarity. Dinner with friends calls for softer tones. Good kitchen island lighting ideas adapt in seconds. With user convenience leading the way, pendant lighting for kitchen island designs now works harder behind the scenes. Antizer Lighting supports this shift with adjustable, dimmable options that fit real life—quick breakfasts, messy baking sessions, and everything in between. Smart, stylish, efficient. That’s why kitchen island pendant lighting ideas keep trending—and why they’re not slowing down anytime soon. 8 Kitchen Island Pendant Lighting Ideas You’ll Love Great kitchen island pendant lighting ideas can totally change how your space feels. From bold modern lines to cozy farmhouse vibes, the right kitchen island lighting ideas make cooking, chatting, and late-night snacking way more enjoyable. Let’s break down stylish options that truly work. Modern Matte Black Linear LED with Adjustable Brightness When exploring kitchen island pendant lighting ideas, this modern, matte black, linear, LED design stands out for clean impact and control. It’s built for homeowners who want sharp lines and smooth light across a wide kitchen island. Core Features Adjustable brightness for prep, dining, or ambient glow Slim pendant light profile Even light distribution Ideal Placement Center over long islands Hang 30–36 inches above countertop Align parallel to island length Why It Works Minimal glare Strong task performance Pairs well with stone or quartz counters At Antizer Lighting, dimmable linear fixtures are tuned for steady brightness without flicker, keeping your kitchen pendant lighting practical yet stylish. Rustic Wood-and-Rattan Drum pendant in Warm White Love natural textures? This rustic, wood, and rattan drum pendant blends warmth and character. Design Breakdown Woven shade softens warm white glow Visible grain adds depth Airy structure prevents heavy shadows Best Fit Farmhouse cabinets Neutral backsplashes Butcher block islands Layering tip: Use two medium drums for a 6-foot island. Match with bronze hardware. Add under-cabinet strips for balance. These kitchen island lighting ideas feel relaxed and welcoming, perfect for casual homes. Industrial Copper Cone fixtures with Edison Bulb Compatibility If bold is your thing, go industrial with a copper, cone fixture setup featuring Edison bulb compatibility. Visual Impact Warm metallic shine Vintage-style filament glow Strong downward task focus Installation Guide Space evenly across island length Use dimmable vintage bulbs Keep ceiling cords uniform Here’s a quick performance comparison: Bulb Type Avg Lumens Color Temp (K) Energy Use (W) Edison LED 450 2200 6 Standard LED 800 3000 9 Halogen Vintage 600 2700 43 Smart LED 800 2200–4000 10 For statement-driven kitchen island pendant lighting ideas, copper always delivers attitude. Transitional Brushed Nickel Bell shape for Ambient Lighting This transitional, brushed nickel, bell shape pendant blends classic curves with modern polish. Style Balance Soft ambient lighting Clear or frosted glass Timeless ceiling mount Works Well With Shaker cabinets Marble countertops Mixed metal finishes Need something safe but not boring? This is your go-to kitchen pendant lighting choice. Minimalist Acrylic Globe pendants in Polished Chrome Clean and sleek. That’s the vibe here. The minimalist, acrylic globe form paired with polished chrome hardware feels fresh and light. Perfect for smaller kitchens where heavy fixtures crowd the view. Key advantages: Diffused LED glow Adjustable drop length Easy cleaning surface For modern homes searching for smart kitchen island pendant lighting ideas, globes offer quiet elegance without stealing attention. Contemporary Gold Cylinder lights with Integrated LED These contemporary, gold finish, cylinder light pendants with integrated LED bring sharp vertical lines. Design Perks Slim profile Energy-efficient core Focused downward beam Layout Plan Use three cylinders for symmetry Keep spacing equal Match with gold faucet accents This option elevates everyday kitchen island lighting ideas into something upscale but still approachable. Farmhouse White Fabric drum for task lighting Soft yet practical. The farmhouse, white fabric, drum shade filters light gently while still delivering solid task lighting. Why Homeowners Love It Cozy feel Neutral color match Height adjustability Pair with warm bulbs and wood stools for that laid-back breakfast nook energy. Rustic Concrete Geometric multi-light installation For bold personalities, this rustic, concrete, geometric, multi-light setup creates a real statement piece. Structure Multiple hanging points Raw texture finish Strong downward beams Installation Flow Anchor to reinforced ceiling box Adjust staggered heights Test beam spread across island This style blends modern industrial edge with practical coverage. If you’re collecting daring kitchen island pendant lighting ideas, this one turns heads fast. Smart lighting isn’t just about looks. The right kitchen island lighting makes daily life smoother, brighter, and honestly, way more fun. Drum Vs. Globe Vs. Linear: Which Pendant Wins? Kitchen island pendant lighting ideas can totally change how your space feels. Break the phrase down—kitchen, island, pendant, lighting, ideas—and each word matters. From cozy corners to sleek layouts, the right pick shapes mood, brightness, and daily workflow in ways you actually notice. Drum When scanning kitchen island pendant lighting ideas, the drum pendant light stands out for its easy glow and relaxed vibe. Core Design Shade Materials Fabric for soft ambient light Wood for earthy transitional style Rattan for airy texture Form Clean cylinder Works as a single pendant Strong look in a cluster pendant setup Lighting Effect Diffusion Even diffused glow Reduces harsh shadows over a kitchen island Placement Centered above island Evenly spaced in pairs for balanced kitchen island lighting Style Fit Farmhouse kitchens Casual modern drum shade interiors For relaxed kitchen pendant lighting ideas, drum styles feel warm without trying too hard. Globe The globe pendant light brings smooth curves and a crisp minimalist look. A spherical fixture throws warm illumination in every direction, which works great in open concept homes. Clean glass = brighter glow Frosted finish = softer mood Oversized globe = bold statement piece Many homeowners hunting for kitchen island pendant lighting ideas lean toward this contemporary design because it keeps sightlines open. It’s subtle kitchen decor that still feels fresh. Fixture Type Avg. Diameter (in.) Light Spread (°) Ideal Island Length (ft.) Small Globe 8–10 300–360 4–5 Medium Globe 12–14 360 5–6 Large Globe 16–18 360 6–8 Cluster Set 3×8 360 combined 6–7 For anyone collecting kitchen island pendant lighting ideas, globe fixtures balance style and even coverage without visual clutter. Linear The linear pendant light is all about direction and purpose. Structure Rectangular fixture body Elongated design spanning the island Function Focused task lighting Strong output for food prep zones Style Pairings Industrial style kitchens Sleek profile in contemporary homes Surprisingly sharp in a farmhouse kitchen If your kitchen island pendant lighting ideas focus on performance, this over island option wins on coverage. It throws light exactly where you need it. No fuss. Just clean lines and energy-smart output that makes everyday cooking feel easier. Limited Space? Slimline Kitchen Island Pendants Small kitchens call for sharp thinking. Smart kitchen island pendant lighting ideas can free up headroom, keep sightlines open, and still give you that warm glow everyone loves. This guide breaks down practical island lighting ideas that feel modern, not cramped, and totally doable for real homes. Sleek Metal Cylinder with Sloped Ceiling Adaptable mount When square footage feels tight, slim kitchen island pendant lighting ideas make all the difference. A metal cylinder pendant keeps the profile lean while still delivering focused kitchen island lighting. Core Design Features 1.1 Streamlined Body Narrow diameter reduces visual bulk. Works beautifully in modern design kitchens. 1.2 Mounting Flexibility Sloped ceiling adaptable canopy keeps alignment clean. Smooth adjustable height system prevents awkward cord drape. Functional Advantages 2.1 Space Efficiency Ideal for compact islands under 60 inches. 2.2 Visual Order Vertical emphasis draws the eye upward, making ceilings feel taller. Application Tips 3.1 Pair two evenly spaced pendants for symmetry. 3.2 Keep bottom clearance at 30–34 inches above the countertop. 3.3 Use warm 3000K bulbs to soften reflective surfaces. For homeowners searching kitchen island pendant lighting ideas that won’t overwhelm a narrow room, this style balances presence and restraint. Brands like Antizer Lighting refine this approach with clean finishes in matte black or bronze, proving slim can still feel bold. Ultra-thin Glass Linear LED for Ambient Lighting Some kitchen island pendant lighting ideas focus on openness. A linear LED pendant crafted from ultra-thin glass stretches across the island without blocking views. The effect is calm, almost floating. Key benefits: Seamless ambient lighting across prep space Integrated, energy efficient LED modules Minimal hardware for a sleek kitchen island fixture Performance snapshot: Feature Output (Lumens) Wattage (W) Lifespan (Hours) Color Temp (K) 36" Linear LED 1800 24 50,000 3000 48" Linear LED 2400 32 50,000 3000–3500 60" Linear LED 3200 40 50,000 3000–4000 Short takeaways: Clean line. Wide glow. Low glare. For modern kitchen lighting ideas, this format keeps the island bright without clutter. If you’re hunting practical kitchen island pendant lighting ideas, a slim linear profile checks both style and efficiency boxes. Compact Cone Single Pendant in Bronze with Easy Installation Not every island needs a trio of fixtures. Sometimes one compact cone pendant does the job, especially over smaller prep zones. Style & Finish 1.1 Tapered silhouette directs light downward. 1.2 Rich bronze finish adds warmth to white cabinetry. Installation Simplicity 2.1 Pre-wired canopy supports easy installation. 2.2 Standard junction box compatibility reduces electrician time. 2.3 Lightweight single light fixture design simplifies ceiling support needs. Lighting Performance 3.1 Focused beam enhances task work. 3.2 Works well as a kitchen island accent in pairs. 3.3 Compatible with dimmers for mood shifts. For cozy homes seeking flexible kitchen island pendant lighting ideas, this cone style feels approachable and durable. Antizer Lighting offers options that blend solid construction with a compact footprint, giving small islands a polished finish without crowding the room. FAQs about Kitchen Island Pendant Lighting Ideas Why are kitchen island pendant lighting ideas so popular right now? Today’s kitchens demand personality and performance in equal measure. The right pendant becomes both light source and statement piece. Design pull: Modern and Minimalist spaces love Matte Black or Polished Chrome Metal Cylinders; Farmhouse and Rustic rooms lean toward Wood, Rattan, or warm Bronze finishes. Lighting upgrade: Integrated LED, Energy Efficient output, and Adjustable Brightness fit busy homes. Mood control: Warm White for intimate dinners, Cool White for sharp Task Lighting. It’s not just décor—it’s daily life under better light. How do I choose the best style and finish for my space? Your island lighting should echo your room’s voice, not fight it. Match the design style Contemporary → Gold or Brushed Nickel with Globe or Geometric Glass Industrial → Copper Cone, Edison Bulb Compatible Transitional → Fabric Drum in White or Bronze Balance materials Heavy Concrete or Metal islands pair well with softer Glass or Fabric shades. Wood cabinetry glows under Warm White LED. When finish and form align, the island feels intentional, not accidental. Which pendant shapes and features work best for function? Great kitchen island pendant lighting ideas blend beauty with purpose. ◉ Linear fixtures stretch across long islands for focused Task Lighting. ◉ Globe or Bell shapes cast smooth Ambient Lighting over seating areas. ◉ Cylinder or Cone designs direct light downward—ideal for prep zones. ◉ Dimmable, Adjustable Height options shift from bright chopping sessions to soft evening gatherings. Form shapes the beam; features shape the mood. What installation options should I consider before buying? A quick guide to avoid regret later: Island Size Best Installation Visual Impact Practical Benefit Small Single Pendant, Ceiling Mount Clean, Minimalist Easy Installation Medium Two Hardwired Pendants Balanced symmetry Durable, steady light Large Multi-Light or Track Lighting Compatible Bold Statement Piece Wide Task Lighting coverage Sloped Ceiling Sloped Ceiling Adaptable with Adjustable Cord Aligned elegance Flexible positioning Choose installation with intention—because once it’s mounted, your lighting becomes the heart of the room.

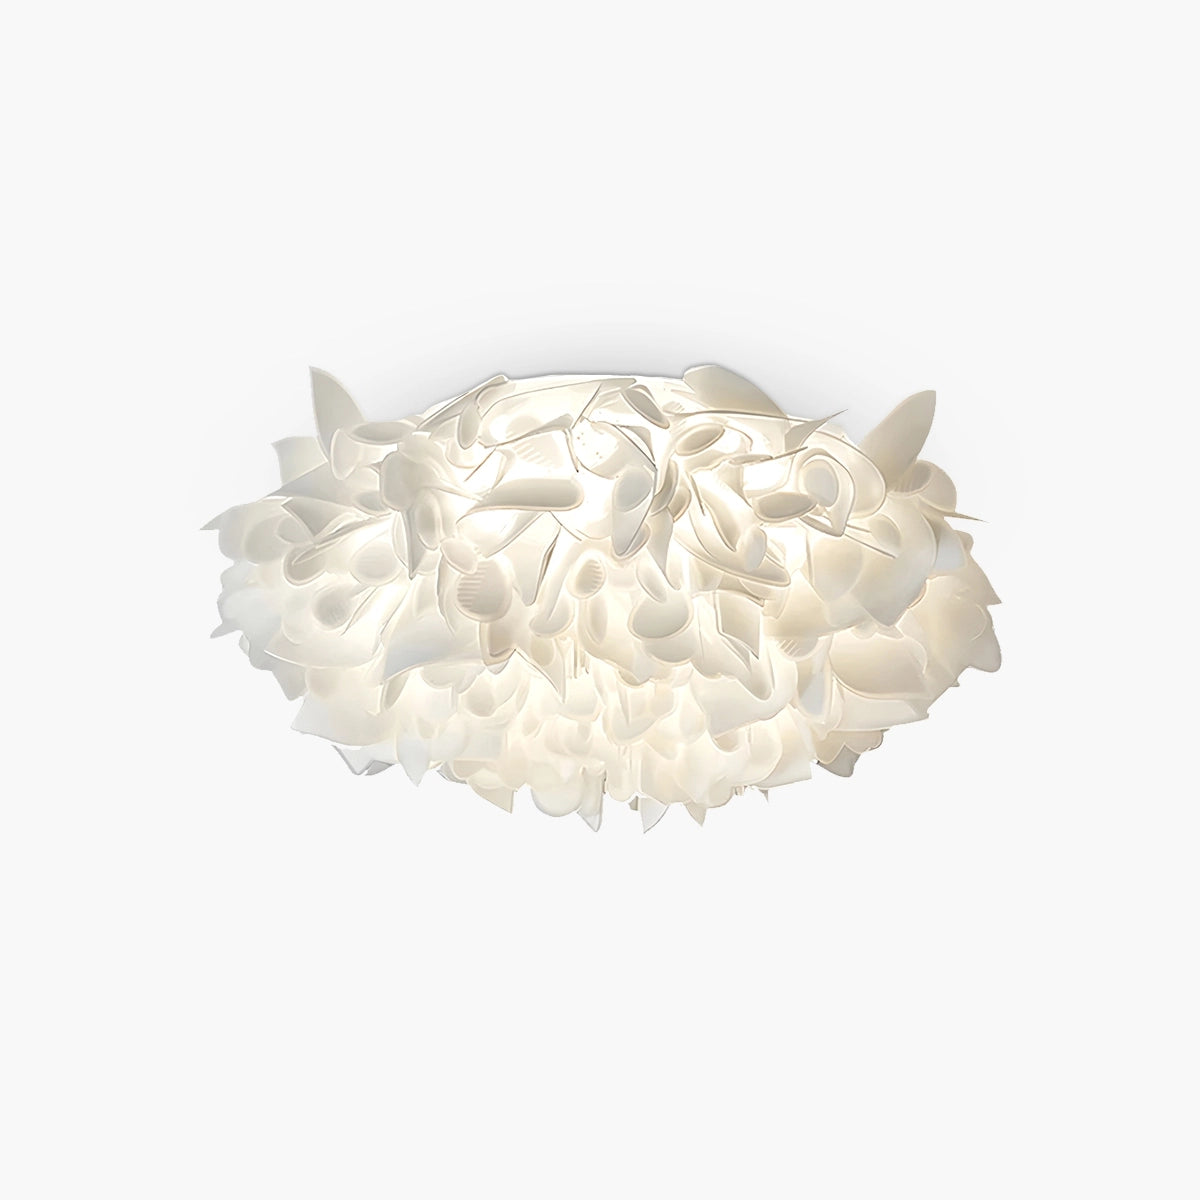
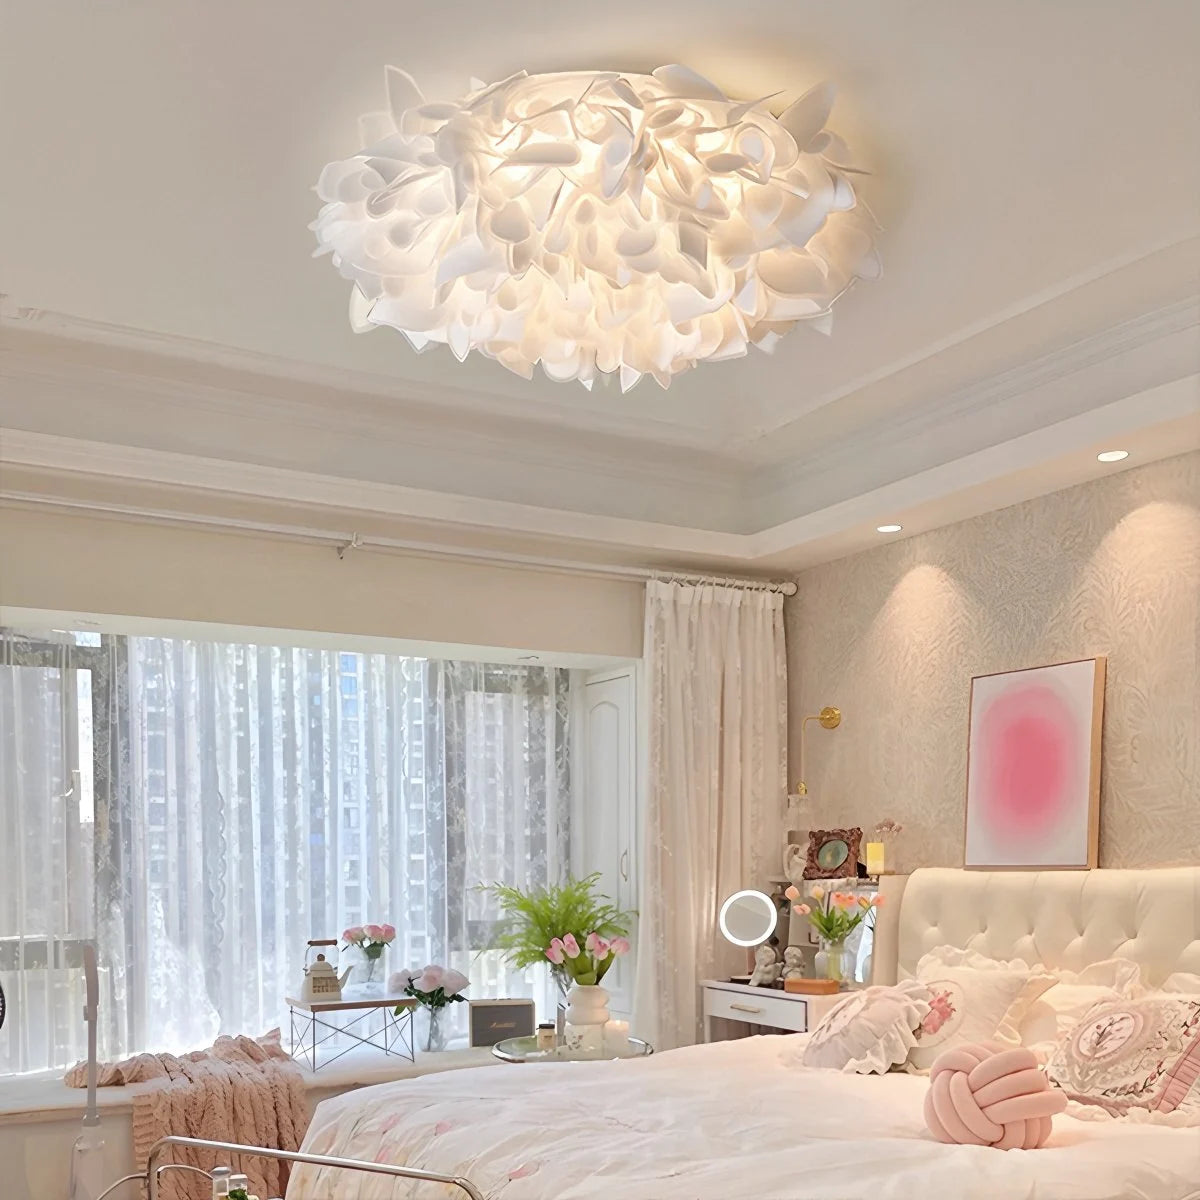
5 Stunning Floral Ceiling Lights That Will Transform Your Bedroom
Trade dentist-office glare for bedtime poetry—floral ceiling lights bloom overhead, wrapping your room in cozy drama and smart LED charm. Floral ceiling lights aren’t just fixtures—they’re mood-setters with a flair for drama. One flip of the switch and your bedroom can go from flat and forgettable to soft, glowing sanctuary. If your overhead light feels like a dentist’s office special, it’s no wonder winding down feels impossible. The right bloom-inspired glow wraps the room like a favorite sweater and whispers, “Hey, you’re home.” The U.S. Department of Energy reports LED lighting uses at least 75% less energy and lasts 25 times longer than incandescent bulbs. Smart choice, smart savings. Here’s the twist: style and serenity don’t have to arm wrestle. A sculpted petal fixture can cast gentle shadows, dim on cue, and still steal the spotlight. Ready to trade harsh glare for a little bedtime poetry? Key Points in Bloom: Floral Ceiling Lights ➔ Select soft fabric diffusers or warm glass shades to create a soothing ambiance. ➔ Opt for dimmable LED designs with crystal or wood accents for versatile mood setting. ➔ Match fixture size, finish, and style—modern, vintage, or rustic—to your room’s décor. ➔ Embrace energy-efficient LEDs for lasting performance and lower utility bills. How Floral Ceiling Lights Enhance Relaxation Soft lighting can totally change the vibe of a room. When floral ceiling lights blend shape, glow, and texture, the result feels calm instead of harsh. From flower ceiling lamps to decorative ceiling fixtures with petals, these lights turn everyday spaces into cozy retreats without trying too hard. Soft Fabric Diffuser Pendant Lights for Gentle Ambiance When choosing floral ceiling lights, start with layered comfort. Core material focus: fabric diffuser softens glare Works beautifully in a pendant light format Supports balanced soft lighting Room styling impact: Enhances bedroom decor Highlights subtle floral design curves A fabric shade filters brightness, creating gentle ambiance that feels easy on the eyes. In bedrooms, flower ceiling lights with textile diffusers reduce sharp shadows. In living areas, decorative ceiling lights with blooms spread light evenly, helping the mind slow down after a long day. Warm Color Temperature in Glass Shades to Soothe the Mind Not all glow feels the same. Floral ceiling lights with glass shades offer control over warm color temperature, which plays a real role in mental relaxation. Color Temp (K) Visual Effect Ideal Room 2700K Sunset-like glow Bedroom lighting 3000K Warm white Living room 3500K Soft neutral Dining area 4000K Crisp but balanced Study corner 5000K Bright daylight Task zones Lower Kelvin values create soothing light that pairs well with floral patterns etched into glass. The glow wraps around petals and curves, easing tension without making the room feel dim. It’s a subtle trick, yet it works. Dimmable LED Floral Chandelier with Crystal Accents A dimmable LED system transforms a floral chandelier into a mood tool. Install adjustable controls. Set mid-level brightness for evenings. Lower intensity before sleep. Add crystal accents, and reflections scatter softly across walls. This layered shimmer doesn’t overpower; it calms. In bedroom illumination setups, adjustable brightness keeps things flexible—movie night, reading hour, or total wind-down. Brands like Antizer Lighting refine this balance, pairing elegant design with energy smart builds so flower ceiling fixtures stay stylish and practical. Rustic Wood Elements and Adjustable Brightness for Cozy Vibes For a grounded feel, mix blooms with rustic wood textures. Natural elements add warmth. Petal shapes keep the ceiling visually light. Adjustable brightness adapts to mood shifts. In a bedroom sanctuary, floral ceiling lights with wood trims bring a cozy atmosphere that feels lived-in, not staged. Entryways benefit too; ceiling lights with flowers soften that first impression when you walk in. Antizer Lighting blends natural elements and modern controls, proving that floral ceiling lights aren’t just decorative—they quietly support rest, comfort, and everyday peace. Bulleted Guide: 4 Floral Lighting Options Floral ceiling lights are having a real moment right now. From soft petal shapes to bold sculptural blooms, these ceiling lights mix art and function without feeling over the top. If you’re browsing floral ceiling lights for a bedroom, hallway, or living space, this quick guide breaks down what actually works in daily life. Floral Pendant Light with Acrylic Petal Design When picking a pendant light with acrylic petals, keep it simple but smart: Check ceiling height before choosing a hanging ceiling fixture. Match the floral design size to your room scale. Use warm bulbs for cozy bedroom lighting. For better results: Measure drop length. Center above tables or beds. Balance with other decorative accent pieces. Floral ceiling lights in pendant form shine in smaller rooms because the petal layers reflect light gently. Key points: Light and airy look Easy install Modern vibe Antizer Lighting offers floral ceiling lights in acrylic styles that feel fresh, not fussy. If you want ceiling lights with a soft bloom effect, this one’s a safe bet. Flush Mount Fixture Featuring Metal Frame and Glass Floral Shades A flush mount light works great in rooms with low clearance. Here’s how to think about it: Structure Solid metal frame for durability Frosted glass shades to soften glare Design Subtle floral pattern Clean ceiling fixture profile Placement Hallways Bedrooms needing even bedroom illumination Floral ceiling lights in flush styles spread light evenly across the ceiling. Flower ceiling lamps like this avoid shadows and keep things tidy. If you want dependable floral ceiling lights that don’t hang too low, this style keeps it practical while still giving that garden touch. Semi-Flush Mount Light with Decorative Crystal Flower Accents This semi-flush mount style sits slightly below the ceiling, adding depth without going full pendant. Consider three layers: Base mount Crystal accents Outer flower details Benefits stack up: Soft sparkle Balanced decorative lighting Refined elegant design Floral ceiling lights with crystal touches bounce light around the room, making a bedroom fixture feel brighter without harshness. Ceiling floral lights in this category blend glam and modern in a chill way. Antizer Lighting keeps proportions right, so the glow feels layered, not blinding. Track Lighting System Highlighting Sculptural Floral Forms For something bold, try track lighting with adjustable lights aimed at sculptural blooms. Setup flow: Mount track along ceiling line. Angle heads toward sculptural forms. Highlight metal or resin floral elements. Why it works: Flexible ceiling illumination Modern design edge Great for living rooms Floral ceiling lights don’t always have to be soft and sweet. With tracks, you spotlight the form itself. Floral ceiling lights in this format feel artsy and confident, perfect if you want your ceiling lights to stand out instead of blending in. Scenario: Romantic Dinner Under Blooming Ceiling Light A romantic dinner hits different when floral ceiling lights glow softly overhead. The mix of floral, ceiling, and lights creates that sweet spot between cozy and classy. From vintage glass petals to smart controls, the right floral ceiling lights can turn a regular meal into a date-night vibe without trying too hard. Choosing a Vintage-Style Floral Chandelier: Intimate Warmth When picking a floral chandelier for true intimate ambiance, keep it layered and intentional. Core Style Focus Vintage style details Curved arms with soft decorative elements Frosted or tinted glass petals Subtle crystal trims for gentle sparkle Practical Fit Material selection Glass for glow Metal frames in warm brass or bronze Size considerations Diameter aligned with table width Safe hanging height above eye level Light Feel Soft warm lighting around 2700K Even spread across the dining zone Well-chosen floral ceiling lights in vintage form don’t shout. They hum quietly above dinner, setting tone without stealing attention. Setting Up Smart Dimmable Lights and Color Temperature Options Modern smart lighting makes floral ceiling lights feel alive. Install compatible dimmable bulbs inside your floral ceiling lamp. Connect through app control for quick brightness tweaks. Sync with voice activation for hands-free changes mid-dinner. Adjusting color temperature control shifts the mood fast. Bright white for plating food. Soft amber for dessert. That’s real mood lighting with built-in energy efficiency. The U.S. Department of Energy noted in its 2025 residential lighting update that smart LED systems can reduce household lighting energy use by up to 75% compared to traditional incandescent setups. That means your flower ceiling light looks great and keeps bills chill. Coordinating Dining Area Illumination with Your Floral Fixture Balanced dining area lighting works best when every layer supports your floral fixture. Overall Layout Ambient lighting Main glow from floral ceiling lights Task lighting Subtle wall sconces near sideboards Accent lighting Small spotlights on art or shelves Visual Harmony Match metal tones with chair legs Echo petal shapes in table décor Keep brightness levels aligned for smooth light layering For couples wanting an easy upgrade, Antizer Lighting offers curated floral ceiling lights designed to blend with modern and classic dining rooms. A well-matched floral ceiling light pulls the overall decor together without feeling forced. With thoughtful layering and the right floral, ceiling, lights combo, dinner feels warm, relaxed, and just a little magical. FAQs about Floral Ceiling Lights What makes floral ceiling lights ideal for creating a relaxing atmosphere? Floral ceiling lights soften a room in ways flat fixtures cannot. A fabric diffuser or glass shades temper glare, easing eye strain in bedroom fixtures or living room lighting. Warm color temperature options paired with dimmable lights shift the mood from bright morning energy to a quiet evening glow. Crystal accents and wood elements add gentle sparkle and natural calm without overwhelming the space. The sculptural form and decorative patterns feel intimate, turning a large ceiling light into a comforting presence rather than just a source of illumination. How do I choose the right floral chandelier for my dining area? Start with proportion and feeling, then refine the details. Diameter measurement & height clearance – The chandelier should suit your room size and hang comfortably above the table without crowding sightlines. Material tone – A metal frame with glass shades suits modern design, while ornate details with crystal accents echo traditional decor or vintage style. Functionality – Energy efficient LED with adjustable brightness supports both daily dining area illumination and late-night conversations. A well-chosen chandelier becomes the emotional center of the dining space, not just an accessory. Are floral ceiling lights suitable for small or modern spaces? Yes—when scale and structure are handled with care. For compact design needs: Semi-flush mount lights or flush mount lights maintain clean lines and proper height clearance. Acrylic components or a slim metal frame support a contemporary look without visual clutter. For flexible layouts: Pendant lights over kitchen ceiling lights zones Recessed lighting or track lighting for subtle directional lighting support Smart lighting compatibility for effortless control Even a small fixture with a unique shape can carry strong personality, giving hallway lighting or an entryway fixture quiet drama without crowding the room.

3 Creative Ways to Style Flower String Lights for Any Occasion
Flower string lights have a funny way of stealing the show. You hang them up for a small get‑together, and suddenly your space feels less “just another Tuesday” and more movie‑night magic. Yet most homes still lean on one lonely overhead fixture, leaving corners dull and vibes flat. Here’s the rub: lighting sets the mood before guests even kick off their shoes. A warm glow can turn awkward small talk into easy laughter. So how do you style them without your place looking like a craft store exploded? That’s where the real fun begins. How Can You Style Petal Lights? Soft glow can totally shift a room’s mood. From living room corners to a calm minimalist bedroom, smart use of flower string lights adds warmth without fuss. Here’s how to style petal lights in ways that feel natural, stylish, and easy to live with. Transform Your Living Room with Bohemian Petal Lighting In a relaxed living room shaped by bohemian style, layering matters. Core Lighting Setup Petal lights draped along curtain rods Warm string lights woven through open shelving A dimmable floor lamp for soft ambient lighting Texture Pairing Rattan pendants Linen throws Woven rugs that boost that cozy atmosphere Placement Strategy Frame the seating area with flower string lights. Keep bulbs at eye-level or slightly above. Use warm LED tones to flatter skin and fabrics. Antizer Lighting offers floral string lighting options that blend right into layered home decor, giving your chill zone a relaxed, artsy vibe without going overboard. Brighten Your Entryway: Petal Lights with a Modern Twist Your entryway sets the tone. Clean lines meet glow when petal lights pair with a sleek flush mount. Try this mix: Integrated LED ceiling fixture A short strand of flower string lights around a mirror Neutral walls for crisp modern design Keep cords tidy near the junction box. Let the string lights act as a subtle statement piece, not clutter. Grand View Research noted in its 2025 home décor lighting update that demand for decorative LED accents continues to rise as homeowners prioritize personalized interior design and welcoming ambiance. That’s exactly where Antizer Lighting fits—smart design, easy install, instant welcome. How to Integrate Flower String Lights into a Minimalist Bedroom A calm minimalist bedroom thrives on restraint. Headboard Focus Install flower string lights just above the frame Choose soft white LEDs Hide plugs behind nightstands Clean Aesthetic Rules Stick to neutral cords. Limit extra décor. Let floral fairy lights act as subtle accents. The goal is a calm environment with gentle lighting ideas that support rest. With Antizer Lighting, floral string lights and modern flower lights stay delicate, never busy—just enough glow to keep the mood soft and the bedroom decor effortlessly cool. 3 Ways To Drape Flower String Lights Elegantly Soft lighting changes the vibe fast. With the right flower string lights, you can turn everyday rooms into warm, inviting spaces that feel styled but still relaxed and real. Drape Flower String Lights Over a Kitchen Island for a Cozy Look When styling a kitchen island, balance is everything. You want charm without blocking task lighting. Plan Your Layout Measure the island length. Note pendant drop height. Keep sightlines clear. Layer the flower string lights Wrap loosely around a multi-light pendant. Let a few flower lights strands fall naturally. Keep bulbs above eye level for comfort. Protect Function ✔ Maintain clear task zones. ✔ Avoid covering recessed lighting. ✔ Use adjustable brightness. For smart lighting design, choose warm 2700K tones. A soft glow builds cozy ambiance without overpowering prep areas. In modern home decor, subtle floral string lighting from Antizer Lighting adds warmth while keeping the island practical. Enhance Your Dining Room with Softly Draped Floral Lighting In a dining room, light should flatter faces and elevate the table. Anchor Beneath the Fixture Drape flower string lights under a chandelier or semi-flush mount. Keep spacing even across the frame. Refine the Glow Use dimmable bulbs. Stick to warm color temperature. Highlight crystal or glass accents. Elevate the Mood Soft floral lighting enhances elegant decor. Gentle ambient lighting supports the table setting. For a clean finish, hide extra cord along the chain. Antizer Lighting offers flexible flower and string light designs that blend into formal dining spaces without looking busy. Create an Elegant Bedroom Ambiance with Petal Light Draping A calm bedroom ambiance starts with low, soft layers. Frame the Space Outline a canopy. Trace a headboard wall. Let petal lights fall slightly at corners. Adjust the Intensity Choose low wattage. Keep lumens soft. Add smart controls for nighttime ease. Build the Feeling Soft illumination supports an elegant atmosphere. Thoughtful placement enhances overall interior design. Use flower string lights as accent lighting, not the main source. A gentle flower-and-string glow feels intimate, relaxed, and personal. Antizer Lighting makes it easy to dial in that sweet spot between stylish and serene. Cozy Patio: Hanging Flower Lights A cozy patio can shift the whole mood of your home after sunset. With the right flower string lights, even a simple seating area turns into a warm hangout spot. This guide walks through styling ideas that blend outdoor lighting, texture, and easy charm without overcomplicating your garden decor. Illuminate Your Patio with Vintage-Style Flower String Lights To shape a relaxed ambiance using vintage-style flair and flower string lights, build your setup with layers: Placement Strategy 1.1 Overhead Beam Lines Attach flower string lights along wooden beams for balanced outdoor lighting. Keep spacing even to avoid dark gaps. 1.2 Perimeter Framing Outline the patio edge with flower lights to define the space. Use warm LED bulbs for that soft golden glow. Power & Safety 2.1 Outdoor-Rated Cords Choose weatherproof connectors. Secure with insulated clips. 2.2 Swag Kit Support Ideal for renters who want plug-in flexibility. Styling Details 3.1 Mix Materials Pair metal hooks with rustic wood. 3.2 Brand Choice Antizer Lighting offers durable flower string lights designed for steady brightness and long evenings outside. When installed with care, flower string lights don’t just light the area—they anchor the whole garden decor vibe. Boho-Inspired Outdoor Decor: Hanging Flower Lights on Your Patio Boho style feels relaxed, a little artsy, never stiff. In your outdoor space, combine flower string lights with woven textures and soft layers. Add rattan lanterns beside flower lights for depth. Drape string lights loosely across a pergola. Let a few strands hang slightly lower for a playful touch. For a chill festive atmosphere, try this flow: Mount hooks securely. Hang flower string lights in gentle curves. Step back and adjust symmetry. Plug in and check brightness levels. Quick upgrades make a difference: swap harsh bulbs for warm LEDs, blend in potted plants, and match cushions to your home accents. Many homeowners lean toward Antizer Lighting because the flower string lights hold up in changing weather while keeping that soft boho glow. The result feels easygoing, stylish, and totally inviting. Battery-Powered Versus Plug-In Floral Lights Soft lighting can totally change the vibe of a room. When it comes to flower string lights, the big choice is simple: battery-powered or plug-in? Each setup fits different lifestyles, spaces, and moods. Let’s break down how flower lights, string lights, and floral string lights work in real homes. Battery-Powered Flower Lights: Flexibility and Convenience Battery-powered flower string lights are all about portability and wireless freedom. No outlet nearby? No problem. Ideal for: Bedrooms Stairwells Bathrooms Small corners needing decorative glow Here’s how they shine in everyday use: Easy Setup No drilling. No electrician. Just hang and switch on. Temporary Displays Great for parties. Seasonal décor swaps. Rental apartments. Outdoor Use Wrap around balcony rails. Add charm to picnic tables. Style short-term event lighting. Because these floral string lights run on low-wattage LEDs, they pair well with timers. That means your flower fairy lights switch off automatically, saving battery life. For anyone styling decorative accents in tight spaces, battery flower lights from Antizer Lighting offer compact builds and soft glow options. The vibe feels relaxed. No cords trailing across the floor. Just clean, cozy illumination. If flexibility matters more than permanence, battery-powered flower string lights simply make life easier. Why Choose Plug-In Floral Lights for Long-Lasting Ambiance? Plug-in flower string lights bring continuous power and steady performance. No swapping batteries every few weeks. Just reliable shine. Living rooms and dining areas benefit most: Consistent brightness for daily use Strong fit for permanent installations Reliable glow for extended use during gatherings Setup is simple: Mount along ceilings or shelves. Connect to outlet. Add dimmer or smart plug. Upgrade options: Smart home syncing Voice control Scheduled automation According to the International Energy Agency’s 2024 lighting update: LED-based decorative lighting continues to expand in residential indoor spaces due to energy efficiency and long operational life, supporting sustained consumer demand for plug-in formats. That explains why indoor spaces lean toward plug-in flower lights. You get stable lumens, better dimming control, and compatibility with event lighting setups. Antizer Lighting designs plug-in floral string lights for steady output without flicker, making them ideal for cozy dinners or long movie nights. When brightness needs to stay consistent and maintenance stays low, plug-in flower string lights are the smarter long-term move. FAQs about Flower String Lights How can I style flower string lights in a modern living room? Flower string lights soften a modern or contemporary living room when layered with structured fixtures. Drape them around a flush mount light or beneath a chandelier to add warmth against glass or metal finishes. Pair with recessed lighting for balanced lumens and a steady color temperature. Keep cords neat along a ceiling mount or wall edge so the glow feels intentional, not cluttered. The contrast between clean lines and delicate petals creates quiet drama at night. Are flower string lights suitable for a dining room setting? Yes—especially when paired thoughtfully with a multi-light pendant or statement island light. Soft strands can: Frame a dining room chandelier in crystal or wood. Add dimmable sparkle above a farmhouse table. Echo warm LED integrated tones for cozy meals. Keep brightness moderate so the table remains the star while the florals whisper around it. What’s the difference between plug-in and hardwired flower string lights? The choice affects mood and installation. ✦ Plug-in: Easy setup in a bedroom or stairwell No junction box required Flexible for renters ✦ Hardwired (ceiling mount with canopy kit): Cleaner look in an entryway or living room Works well beside a pendant lamp or semi-flush mount light Stable brightness and smart lighting compatibility One feels playful and free; the other feels polished and permanent. Can flower string lights work in minimalist or industrial spaces? Surprisingly, yes. A minimalist bedroom with acrylic or metal finishes benefits from a soft counterpoint. In an industrial loft with track lighting and exposed bulbs, floral strands break the hardness just enough. Choose warm lumens, slim wiring, and keep the layout restrained. The tension between raw materials and delicate light adds depth without clutter. How bright should flower string lights be over a kitchen island? Over a kitchen island, aim for gentle support rather than spotlight strength. Area Suggested Brightness Pair With Small island 200–300 lumens Single pendant lamp Large island 300–400 lumens Multi-light pendant or recessed lighting Decorative layer Soft warm color temperature Glass or rattan shades Let the main island light handle tasks. Let the flower string lights handle atmosphere—the glow that lingers after dinner ends.

Why the Flower Light Pendant Is the Hottest Lighting Trend of 2026
The flower light pendant has strutted into 2026 like it owns the room—and honestly, it kind of does. One flip of the switch and your plain‑Jane ceiling turns into a blooming showstopper. If your space feels flat or forgettable, that’s the ache talking. Lighting isn’t just décor; it’s the mood ring of your home. I saw one over a kitchen island last month—soft gold petals, warm glow—and suddenly the whole place felt like Sunday brunch at a boutique hotel. Cozy, but with a wink. Grand View Research reports the global decorative lighting market is projected to surpass $60 billion by 2030, fueled by design‑driven demand. Designers call sculptural lighting “the jewelry of a room.” So why is this blossom-shaped beauty flying off shelves—and could it be the spark your space has been craving? Why 2026 Belongs to Flower Light Pendants In 2026, the flower light pendant is not just décor—it’s a vibe. Homeowners want soft curves, smart controls, and lighting that feels alive. From petal-shaped light fixtures to floral pendant lamps, the mix of nature and tech is everywhere, and it’s honestly hard to ignore. Antizer Ginkgo Chandeliers-B for Living Room Modern bohemian petal design for smart home setups The rise of the flower light pendant in smart interiors is tied to three lifestyle shifts: Open-plan living demanding softer visual dividers Growth of smart home systems like Wi-Fi dimmers and voice assistants Preference for organic forms over sharp industrial lines Under this shift, modern bohemian petal styles stand out. Design Layer Petal silhouette Soft curved edges reduce harsh shadows Works well as a central flower ceiling pendant Layered blossom structure Double or triple petal tiers Creates depth under warm light Technology Layer Smart compatibility Syncs with Alexa, Google Home, or app-based hubs Adjustable brightness for day-to-night mood Color tuning Warm 2700K for cozy evenings Neutral 4000K for focused tasks A flower light pendant from Antizer Lighting often blends hand-shaped petals with integrated smart drivers. That combo keeps the space relaxed but future-ready. It’s stylish, yet it talks to your phone. Pretty cool, right? Energy-efficient LED integrated floral pendants Energy savings aren’t boring anymore. A modern flower light pendant with integrated LED technology gives you style and lower bills in one go. The light source hides inside sculpted petals, so you see glow, not glare. Here’s a quick comparison: Model Type Wattage (W) Luminous Output (lm) Lifespan (Hours) Annual Energy Cost (USD)* Traditional Bulb Pendant 60W 800 lm 1,000 26 Basic LED Pendant 18W 850 lm 15,000 8 Integrated LED Flower Light Pendant 12W 900 lm 30,000 5 *Estimated at average residential rate. Notice the jump in lifespan. That’s less ladder time and fewer replacements. Many homeowners now look for: Dimmable drivers Flicker-free output High Color Rendering Index (CRI >90) A floral pendant lamp with built-in LED keeps petals slim and elegant. Antizer Lighting pushes this further by pairing energy-efficient chips with heat-dissipating aluminum cores, extending performance without bulk. The result? A light flower pendant that feels airy but works hard behind the scenes. Timeless appeal of ceramic and rattan blossoms Trends come and go, yet ceramic and rattan keep showing up in every stylish home feed. The flower light pendant made from these materials carries texture you can actually feel. Ceramic Flower Designs Material Traits Fired clay with glazed finish Smooth, cool surface Interior Fit Minimalist dining rooms Contemporary entryways Visual Effect Reflects light softly Enhances warm-tone bulbs Rattan Blossom Styles Material Traits Hand-woven natural fibers Lightweight structure Interior Fit Bohemian bedrooms Coastal living spaces Visual Effect Creates patterned shadows Adds earthy warmth A well-crafted flower light pendant in ceramic feels clean and refined. In rattan, it feels relaxed and beachy. Both versions balance form and function, which explains why homeowners keep choosing this kind of pendant light flower design year after year. Brands like Antizer Lighting tap into this mix of craft and durability, offering blossom-shaped lighting that doesn’t feel mass-produced. And that’s the sweet spot for 2026: tech-savvy, energy-smart, and still beautifully human. 3 Reasons Flower Light Pendants Sell Out Fast Flower light pendant trends are blowing up right now. From soft petal curves to bold metal frames, this flower light pendant vibe mixes charm and edge. Here’s why every flower pendant light and floral hanging light keeps disappearing from carts. Antizer White Flower Pendant Light for Living Room Instagram-worthy aesthetics ignite the bohemian design craze Visual magnetism of a flower light pendant Design elements driving clicks Petal-inspired curves enhancing aesthetics Matte gold, black, white finishes elevating decor Sculptural forms boosting visual appeal Social influence loop Styled kitchens shared on instagram Reels amplifying trendy home updates Hashtags fueling bohemian design cravings Why a flower light pendant photographs so well Soft shadows create depth Open-frame petals frame faces and tables A single flower light pendant turns blank ceilings into statement art Antizer Lighting taps straight into this scroll-stopping demand, shaping each flower light pendant to feel bold but still livable. Easy installation and adjustable height for instant upgrades Practical perks homeowners love Simple installation system Clear wiring layout UL-certified lighting fixture components Flexible adjustable height options Short drop for cozy dining Extended rod for vaulted ceilings Why DIY fans grab a flower light pendant fast Weekend-friendly DIY upgrade Quick win for home improvement goals Seamless fit in a modern home A flower light pendant swaps in without drama, yet the impact feels major. Warm white, dimmable bulbs heighten cozy atmospheres Lighting performance that seals the deal Integrated warm white bulbs (2700K–3000K sweet spot) Smooth dimmable control for real lighting control freedom Mood transformation with a flower light pendant Low brightness = intimate cozy atmosphere Mid-level glow = balanced ambient lighting Soft shimmer on petals = relaxed mood lighting That’s the magic. A flower light pendant isn’t just a flower ceiling light; it’s everyday home comfort with style. No wonder every flower light pendant drop sells out fast. Types of Flower Light Pendant Styles A flower light pendant blends art and function, turning simple lighting into something that actually feels alive. From soft glass curves to bold metal petals, this flower pendant light family fits modern lofts, cozy kitchens, and everything in between. Antizer French Romance Tulip Matcha Light Pendant Minimalist glass globe with LED integrated source When a flower light pendant meets a glass globe, the vibe turns calm and clean. This style focuses on: glass globe clarity hidden LED power seamless integrated light source sharp clean lines Within this look, design choices often fall into a clear hierarchy: Core Structure 1.1 Single glass globe shell 1.2 Frosted or clear finish Lighting System 2.1 Energy-saving LED module 2.2 Long-life integrated light source (no bulb swaps) Aesthetic Direction 3.1 minimalist design 3.2 sleek, modern silhouette A flower light pendant in this format works great over islands or stair voids. The light flower pendant glow feels soft but steady, and maintenance is almost zero. Many homeowners looking for a clean flower ceiling light end up here because it just makes sense. Industrial metal flower-inspired drum forms This take on the flower light pendant leans bold. Think metal frames shaped into a subtle flower motif, wrapped around a drum shade profile. Design breakdown: Material Language 1.1 Powder-coated metal in matte black 1.2 Brushed bronze for a slightly vintage touch 1.3 Visible hardware highlighting raw materials Light Source Flexibility 2.1 exposed bulbs 2.2 Edison-style filament for rustic charm Spatial Impact 3.1 Wider diameter for dining tables 3.2 Layered petals for shadow play Performance comparison for common configurations: Model Type Diameter (cm) Wattage (W) Lumen Output (lm) Ideal Room Size (㎡) Small Drum 30 40 450 8–10 Medium Drum 45 60 800 12–18 Large Drum 60 80 1100 18–25 Dual-Layer 50 70 950 15–22 Open Frame 55 75 1000 16–24 For loft apartments, this flower light pendant style brings edge without feeling cold. Brands like Antizer Lighting refine the structure so the metal floral pendant stays balanced, not bulky. Art Deco ceramic petal designs in rose gold Here the flower light pendant turns glamorous. Smooth ceramic petals radiate outward in a sculpted petal design, often finished in rose gold finish or polished chrome. The structure usually follows: Visual Identity 1.1 Strong Art Deco style symmetry 1.2 Subtle geometric patterns Surface Treatment 2.1 Hand-glazed ceramic 2.2 Metallic rose gold finish accents Mood Creation 3.1 Warm bulbs for luxury warmth 3.2 Statement scale for ornate, vintage glamour dining rooms Short and sweet: it’s bold. It’s classy. It’s not shy. A flower pendant light in this style feels almost like jewelry for the ceiling. In entryways, the floral hanging light catches attention before anyone even takes off their coat. Contemporary acrylic abstract floral shapes This version of the flower light pendant plays with motion and geometry. Lightweight acrylic panels twist into abstract shapes rooted in floral inspiration. Design logic often unfolds like this: Structural Composition 1.1 Layered acrylic sheets 1.2 Interlocking, sculptural curves Color & Light 2.1 Warm white for cozy living rooms 2.2 Cool white for crisp studios 2.3 Optional vibrant colors for playful spaces Artistic Direction 3.1 Strong contemporary design tone 3.2 Bold, unique, almost gallery-like presence In open-plan homes, this light flower pendant almost floats. It’s light in weight but big in personality. Antizer Lighting pushes this artistic angle further, shaping each flower light pendant so it feels custom without the custom price tag. Flower Pendant vs. Traditional Chandelier Choosing between a flower light pendant and a chandelier can feel tricky. One leans modern and playful, the other speaks to tradition and scale. Here’s a clear, down-to-earth look at how a flower light pendant stacks up against a classic favorite. Flower Pendant A flower light pendant stands out for its floral design and organic shape, bringing a relaxed but stylish vibe into everyday spaces. Design Language Core Form Delicate petals create a unique silhouette that feels soft yet artistic. The flower light pendant often features layered curves inspired by nature. Visual Impact Works as an artistic statement without overpowering a room. Pairs well with neutral palettes and wood textures for a modern aesthetic. Functional Strength Light Quality Offers soft illumination, ideal over a kitchen island or bedside table. Flexibility Adjustable cord height keeps the flower pendant practical for low or high ceilings. Ideal Placement Kitchen counters Bedrooms Cozy reading corners The rise of decorative pendants isn’t random. “Decorative lighting with nature-inspired forms continues to gain traction in residential upgrades,” notes the 2025 U.S. Houzz Lighting Trends Study, highlighting strong homeowner demand for sculptural pendants. Brands like Antizer Lighting refine the flower light pendant with smooth finishes and balanced proportions, making the flower light pendant both trendy and lasting. If you want a flower ceiling light that feels fresh but not loud, this style nails it. Traditional Chandelier A traditional chandelier leans into ornate details, crystal accents, and undeniable grandeur. Structural Features Frame Design Multi-arm layouts create symmetry and scale. Metal scrollwork adds classic elegance. Decorative Elements Hanging prisms and glass drops enhance sparkle. Polished finishes boost timeless appeal. Atmosphere Creation Light Distribution Multiple bulbs deliver bright, layered glow suited to formal settings. Visual Weight Acts as a bold statement piece in tall foyers or dining rooms. Best-Fit Spaces Stairwells with height Formal dining areas Entry halls needing drama Compared with a flower light pendant, a chandelier commands attention instantly. Antizer Lighting balances that drama with thoughtful craftsmanship, so the fixture feels refined, not overdone. If your home leans classic and you love sparkle, this route delivers presence in a big way. Which Rooms Suit Floral Pendants Best? A flower light pendant can totally shift the mood of a room. Break the phrase down—flower, light, pendant—and you get softness, glow, and a hanging statement all in one. From kitchens to bedrooms, the right floral light pendant feels natural, not forced. Let’s talk about where this flower light pendant style really shines. Kitchen Island: Warm White Petal Pendant When styling a flower light pendant over a kitchen island, balance is everything. A petal pendant with warm white light keeps the vibe cozy while still practical. Core placement logic Height Hang 28–34 inches above the island surface. Keep sightlines open across the modern kitchen. Spacing One larger accent fixture for small islands. Two or three smaller flower light pendant pieces for longer counters. Functional layers Task lighting from overhead lighting Ambient glow from the soft flower-shaped light Subtle shadow play from the floral design With Antizer Lighting, adjustable cords and integrated LEDs make fine-tuning simple, so your light flower pendant works hard without stealing the show. Gold metal blossoms for dining rooms In a dining room, a gold flower light pendant becomes a true statement piece. Design focus Material: gold metal with a brushed or polished metallic finish Form: blossom design inspired by a sculptural floral chandelier Lighting control 1. Install dimmable bulbs. 2. Shift from bright dinner prep to relaxed evening glow. 3. Highlight the table surface evenly. “Decorative lighting continues to anchor dining spaces as emotional focal points, especially sculptural pendants in metallic finishes,” notes the 2025 U.S. Houzz Kitchen & Dining Trends Study. A hanging flower lamp here doesn’t just light food—it frames conversation. Antizer Lighting designs keep the petals refined, not flashy. Black geometric flower forms in entryways Your entryway sets the tone. A black flower light pendant with a sharp geometric shape and matte black finish delivers contrast fast. Visual structure Shape Angular flower form for a bold edge Placement Centered in a modern foyer Aligned with door and hallway axis Functional impact Bright, welcoming beam from a sculptural light Clear ceiling drop for easy installation Contemporary design that feels intentional This style of flower light pendant works great in homes that lean minimal but still want personality. Fabric flower shapes for tranquil bedrooms A flower light pendant in the bedroom should calm the mind, not energize it. Material direction Soft fabric flowers as a textural element Lightweight decorative pendant frame Atmosphere building Warm, diffused glow for soft lighting Supports a tranquil atmosphere Matches calming decor in bohemian or modern spaces Keep brightness moderate. Let the floral light pendant float gently above the bed or reading corner. A well-chosen flower light pendant from Antizer Lighting adds softness overhead, like a quiet nightlight—but way more stylish. FAQs about Flower Light Pendant What makes a flower light pendant different from a traditional chandelier? A flower light pendant feels lighter, more personal, and easier to place in everyday rooms. Petal design, globe, or abstract floral shapes create artistic focus without overwhelming the ceiling. Modern, minimalist, or bohemian styles blend smoothly into a kitchen island or bedroom. LED integrated, dimmable options offer warm white or cool white light with energy efficient performance. Adjustable height makes it practical for dining rooms, entryways, or even a stairwell. It brings sculpture and light together—without the bulk of a grand chandelier. Are materials like ceramic or rattan durable for daily use? Yes—durability depends on material choice and finish quality. Ceramic – solid structure, glossy glaze, ideal for contemporary or art deco interiors. Rattan or wood – lightweight, natural texture, perfect for bohemian dining rooms. Metal (black, gold, bronze, chrome) – industrial strength with a durable finish for high-traffic living rooms. Glass or acrylic – elegant glow in globe or geometric forms, easy to clean. Most UL listed models are built for long-term indoor use and safe installation. How do I choose the right flower light pendant for a kitchen island? Start with function, then refine the mood. ✦ Choose LED integrated or Edison bulb compatible fixtures for clear task lighting. ✦ Look for adjustable height to align with counter level. ✦ Match finishes—black or chrome for modern spaces, gold or rose gold for warmer tones. ✦ Linear or small drum silhouettes suit long islands; compact petal design styles fit tighter layouts. The right piece should brighten prep space while adding personality. Can a flower-inspired pendant work with smart homes and modern lifestyles? Many contemporary models are smart home compatible and designed for ease. A short look at key features: Feature Why It Matters in Daily Life Dimmable light Soft glow for bedrooms, bright focus for dining rooms LED integrated Lower energy bills, longer lifespan Easy installation Faster upgrades in entryways or living rooms Adjustable height Custom comfort in rooms with varying ceilings The result is lighting that feels expressive, practical, and beautifully human.

Discover The Fusion of Art And Function in Chandeliers
Artistic chandeliers aren’t just ceiling candy—they’re the mic drop of a room. Ever walk into a space and feel it hit you? That glow, that drama, that little spark that says, “Yeah, this place has taste.” A chandelier does that heavy lifting. It’s part sculpture, part spotlight, and part mood-setter. Like the perfect playlist at a dinner party, it quietly runs the show while everyone else takes the credit. And if your room feels flat or forgettable, odds are the lighting’s been playing it safe. Here’s the twist: beauty alone won’t cut it. You need function that works as hard as it wows—light where you need it, style that fits your vibe, and efficiency that won’t spike the power bill. That’s where the magic really starts. Artistic Chandeliers: A Brief Evolution Artistic chandeliers have always been more than lighting. Artistic pieces, chandelier art, and artistic lighting fixtures tell stories about taste, tech, and culture. From candle glow to smart controls, artistic chandeliers keep shifting with design evolution and everyday living. From Vintage Chandeliers to Modern Chandeliers: A Timeline The journey of Vintage Chandeliers to Modern Chandeliers reflects clear Historical Styles and bold Design Evolution in chandelier art. 18th–19th Century Foundations 1.1 Vintage Chandeliers Candle-based frames Hand-forged iron arms Heavy ornament inspired by churches 1.2 Style Influences Early European court designs Pre-electric craftsmanship Early 20th Century Shift 2.1 Art Deco Geometric symmetry Polished metals 2.2 Mid-Century Modern Cleaner lines Glass globes and lighter frames Late 20th Century to Present 3.1 Modern Chandeliers Mixed materials: wood + glass + nickel Minimalist profiles 3.2 Artistic Lighting Fixtures Sculptural arms Adjustable heights Smart dimming Brands like Antizer echo this timeline by blending artistic chandeliers with clean modern chandelier forms that still nod to vintage chandeliers. The Rise of Crystal Chandeliers and Brass Chandeliers in the 19th Century The 19th Century, especially the Victorian Era, loved shine. Crystal Chandeliers and Brass Chandeliers were more than décor; they were social signals shaped by Material Innovation and design movements like Gothic Revival and Art Nouveau. Performance & Material Comparison (19th Century Lighting) Type Main Material Avg. Candle Count Light Reflection Rate (%) Typical Ceiling Height (ft) Crystal Chandelier Lead Crystal 12 85 14 Brass Chandelier Polished Brass 10 60 12 Gothic Revival Iron + Glass 8 55 16 Art Nouveau Brass + Etched Glass 9 65 13 Early Electric Hybrid Brass + Crystal 14 88 15 • Crystal prisms amplified candlelight. • Brass frames improved durability. • Early electric wiring changed scale. “Decorative lighting demand continues to grow as consumers prioritize statement fixtures,” noted the 2025 U.S. Houzz Emerging Home Design Trends Report, highlighting rising interest in chandelier art and premium materials. Artistic chandeliers from this era still inspire today’s artistic lighting collections, especially in high-ceiling homes. Contemporary Fusion: LED Chandeliers Meet Orb and Geometric Designs Modern artistic chandeliers blend tech and style. Here’s how the fusion works: Core Design Directions 1.1 LED Chandeliers Lower energy use 25,000–50,000 hour lifespan 1.2 Orb Designs Circular balance Soft spatial flow 1.3 Geometric Designs Angular drama Clean symmetry Style Alignment 2.1 Contemporary Art influence 2.2 Minimalist Style focus 2.3 Use of Sustainable Materials Smart Integration 3.1 Smart Lighting controls 3.2 App-based dimming 3.3 Voice activation Visual Impact ✦ Floating Sculptural Forms ✦ Lightweight metal frames ✦ Frosted glass diffusers Antizer approaches artistic chandeliers with this mix in mind—pairing LED chandeliers and orb designs to create artistic lighting that feels current but not cold. Artistic chandeliers today aren’t just fixtures; they’re expressive chandelier art built for real homes and real life. 5 Roles Of Artistic Chandeliers In Decor Artistic chandeliers do more than hang pretty from the ceiling. These artistic lighting fixtures shape mood, guide the eye, and quietly define how a room feels day to day. From bold artistic chandeliers in entryways to subtle artistic chandelier designs over dining tables, the right piece changes everything—fast. Role 1: Creating a Focal Point with Oversized Chandeliers When oversized chandeliers take center stage, the whole room shifts around that focal point. As a statement piece, an artistic chandelier commands attention. It builds visual interest in tall spaces. It corrects scale and proportion in open layouts. To make it work: Measure ceiling height. Match diameter to room width. Center the room centerpiece precisely. Many homeowners choose Antizer for large-scale artistic chandeliers because the detailing feels bold yet balanced. Role 2: Setting Ambiance via Dimmable Chandeliers Dimmable chandeliers are all about control and vibe. At dinner, lower the brightness for soft ambiance and gentle mood lighting. During cleanup, raise it for clarity. That’s real lighting control and everyday versatility. Bright for tasks. Low for evening glow. Just right for relaxed conversation. A 2025 U.S. Houzz Lighting Trends report notes: “Homeowners continue prioritizing adjustable lighting systems that shift from functional brightness to intimate atmosphere within seconds.” That’s exactly where artistic chandeliers shine. Role 3: Defining Zones Using Multi-Tier Chandeliers In open layouts, multi-tier chandeliers quietly manage defining zones. Dining Area Acts as spatial division above the table Creates layered lighting for meals Living Area Serves as an architectural element Establishes visual hierarchy Transitional Space Supports subtle room segmentation Creative chandeliers with stacked tiers add depth without building walls. Antizer designs often pair artistic chandeliers with flexible hanging heights, making zoning feel natural, not forced. Role 4: Infusing Style with Rustic and Industrial Chandeliers Style shows up in materials. Rustic chandeliers with wood beams bring texture and warmth. Industrial chandeliers in matte black metal lean edgy and urban. That style infusion shapes the overall design aesthetic of a room. Exposed bolts highlight materiality. Weathered finishes add texture. Bold frames build instant character. Artistic chandeliers in farmhouse kitchens or loft apartments become more than light sources—they’re pure decorative element energy. Role 5: Highlighting Color and Finish—Gold, Black, or Bronze Finish matters. A lot. Gold chandeliers Add subtle glam Reflect warm metallic tones Black chandeliers Create crisp color highlight contrast Anchor pale ceilings Bronze chandeliers Offer soft surface treatment depth Blend with wood and stone The right finish turns artistic chandeliers into polished decorative accents. Even a single artistic chandelier in brushed nickel can shift the mood from plain to pulled-together in seconds. Which Rooms Benefit Most From Artistic Chandeliers? Artistic chandeliers are more than ceiling lights; they’re artistic statements that shape mood, style, and daily living. When you break down “artistic chandeliers,” you get two ideas: art and lighting. Blend those well, and a space instantly feels curated, not random. Let’s talk about where these art chandeliers truly shine. Dining Room Chandeliers: Small or Medium Crystal Statements In a dining room, scale matters. A small chandelier or medium chandelier works best when centered above the dining table, turning a crystal chandelier into a true statement piece. Placement basics: Height: 30–36 inches above table Width: 1/2 to 2/3 table width Lighting effect: Warm ambient lighting Subtle sparkle from crystal drops This is where artistic chandeliers feel intentional. A refined piece from Antizer balances glow and glamour without stealing the whole show. Living Room Chandeliers: Round and Geometric Masterpieces A living room calls for confidence. Think round chandelier for softness or geometric chandelier for sharp modern design energy. Define the focal point above seating. Match lines with coffee tables or rugs. Let it spark as a conversation starter within your interior decor. Artistic chandeliers here act like ceiling sculptures. A bold light fixture from Antizer can anchor open layouts and still keep things relaxed. Grand View Research noted in a 2025 lighting outlook that decorative lighting demand continues rising as homeowners prioritize design-driven upgrades in primary living spaces. Foyer Chandeliers: Mini Chandeliers for Grand Entrances Your foyer sets the tone. A mini chandelier in an entryway can still create a grand entrance with layered hallway lighting. • Keep proportions tight in narrow ceilings • Use reflective finishes for stronger welcoming light • Treat it as the home’s first impression Artistic chandeliers here whisper style right at the door. Bedroom Chandeliers: Soft Glow from Fabric and Glass Designs In the bedroom, vibe beats volume. A fabric chandelier softens glare. A glass chandelier with frosted detail adds soft glow without harsh shadows. Mood builders: Lower wattage Dimmer switches Styling cues: Centered over bed Paired with bedside lighting Art chandeliers in sleep spaces create a tranquil atmosphere and serve as a subtle decorative accent. Antizer designs often lean into this calm, giving artistic chandeliers a relaxed, lived‑in feel. Crystal Vs. LED Chandeliers: Head-To-Head Artistic chandeliers sit at the crossroads of style and function. Some lean into tradition, others chase clean tech vibes. When comparing artistic chandeliers built from crystal and those powered by LED systems, the difference shows up in mood, maintenance, and money. Let’s break down how these chandelier lighting styles actually perform in real homes. Crystal Chandeliers When people talk about artistic chandeliers with serious sparkle, this is what they mean. Design Identity Core Features Cut prisms that create layered refraction Dramatic radiance across ceilings and walls Style Direction Timeless design rooted in traditional décor Ideal for foyers, dining rooms, formal spaces Performance Feel Light Quality Warm glow, softer spread Visual Impact Strong elegance, statement centerpiece energy Best Fit Artistic lighting fixtures in classic interiors Decorative chandeliers where mood matters more than efficiency “Decorative lighting remains central to luxury interior upgrades, with crystal fixtures continuing to symbolize status and refinement in 2025 residential trends.” — Houzz U.S. Home Design Report, 2025 Brands like Antizer craft artistic chandeliers in crystal that balance old-school glamour with modern wiring, so you get beauty without the headache. LED Chandeliers LED-based artistic chandeliers bring a different attitude. Cleaner. Smarter. Lower drama, higher control. Design Philosophy Visual Language Sleek design with slim frames Linear or geometric forms Custom Options Height adjustable cables Dimmable brightness Technology Edge Core Strengths Energy-efficient output Long-term durability Smart Features App control Voice-ready smart technology Practical Value Versatile lighting for kitchens, lofts, offices Modern chandelier styles with lower maintenance Antizer also pushes artistic chandeliers in LED formats, blending modern aesthetics with customizable controls. For buyers choosing between crystal chandeliers and LED chandelier designs, it really comes down to vibe versus efficiency. Both artistic chandeliers shine—just in totally different ways. FAQs about Artistic Chandeliers What sets artistic chandeliers apart from regular modern chandeliers? Artistic chandeliers focus on emotion and presence, not just light. 1) Form with personality – orb chandeliers, geometric chandeliers, and linear chandeliers act like suspended sculpture. 2) Material contrast – crystal chandeliers shimmer with drama, while wood chandeliers and metal chandeliers feel grounded and tactile. 3) Style depth – beyond modern chandeliers, you’ll find vintage chandeliers, industrial chandeliers, and bohemian chandeliers that shape the room’s mood. The result feels curated rather than simply installed. How do I choose the right size and shape for my space? The right artistic chandelier should feel balanced, never crowded or lost. Dining room chandeliers: width about 1/2–2/3 of the table; rectangular chandeliers suit long tables, round chandeliers soften square layouts. Living room chandeliers: high ceilings welcome large chandeliers or oversized chandeliers; lower ceilings benefit from medium chandeliers. Foyer chandeliers: multi-tier chandeliers create drama; mini chandeliers work in compact entries. Kitchen island chandeliers: linear chandeliers keep sightlines clean and practical. Scale creates comfort; shape guides the eye. Which materials and finishes create different moods? A small shift in material or finish can change the entire atmosphere. Crystal chandeliers + gold chandeliers → formal, radiant dining room chandeliers. Brass chandeliers or bronze chandeliers → warm glow in transitional chandeliers or farmhouse chandeliers. Black chandeliers or nickel chandeliers → crisp edge for industrial chandeliers. White chandeliers or glass chandeliers → airy calm for bedroom chandeliers and bathroom chandeliers. Touch, tone, and reflection shape how a room feels at night. Are LED and adjustable features worth it in artistic chandeliers? Beauty matters, yet comfort matters more in daily life. Modern artistic chandeliers often include: LED chandeliers for lower energy use and steady brightness. Dimmable chandeliers to shift from lively dinners to quiet evenings. Adjustable height chandeliers to align perfectly above dining tables or kitchen islands. Smart chandeliers for easy control without leaving your seat. Design draws the eye; control keeps the space livable.